Photo of a man at a computer workstation color grading video footage in DaVinci Resolve. Photo by Ron Lach

If you're a content creator, you know that color grading is essential to achieving the look and feel of your final product. Adobe Premiere is a great tool for video editing, but if you're looking to take your project to the next level, you need to use DaVinci Resolve for color grading. In this blog post, we'll show you how to transfer your Premiere project to DaVinci Resolve for color grading. Stay tuned!

Premiere has been the video editing platform of choice for content creators for years. It's a versatile application that offers a core set of essential tools for editing, basic sound mixing, basic effects, and basic color grading. Premiere's Lumetri Color panel offers some great options and works well for smaller projects, but it's not quite up there with the professional tools and workflow available in DaVinci Resolve, the industry standard for color grading. Adding Resolve into your post-production workflow won't cost you another monthly subscription fee;  Resolve is free and has all the features you need to create a stunning look for your project.

(Don't know how to color correct in Resolve? Take a look at our Quick Guide to Color Correction in DaVinici Resolve blog post to learn how to get started.)

Where we are: you've finished your edit in Premiere and you want to move your project to DaVinci for Color Grading and then bring it back into Premiere to combine it with your sound mix and do your final export.

Here are two workflow options to make that process pretty painless.

Before You Get Started

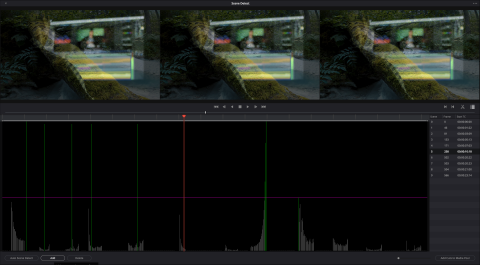
The first step for either of the options below is cleaning up your timeline. Lots of tracks, titles, and effects can cause issues for the rest of this workflow, and in general, you don't need them for color grading. So, duplicate your final cut in your Premiere sequence and in the new duplicated sequence, which we'll call our "Color Export Sequence," then:

  1. remove all the titles,
  2. move all the footage down to track 1,
  3. remove any video clips we don't actually see in the final cut that may still be in the sequence,
  4. remove any color grading or effects that modify the color of your clips (like Lumetri Color) by selecting all the clips and right-clicking and choosing "Remove Attributes" then you can select exactly which effects you want to remove, 
    Screen shot of the context menu in Adobe Premiere with the Remove Attributes option highlighted.
    Screen shot of the Remove Attributes Window
  5. and you should also make sure any visual effects shots or green screen compositing in your sequence is finalized.

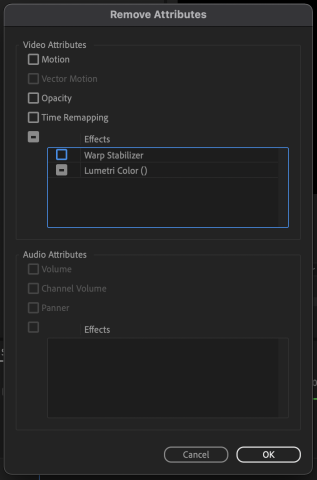
You might also want to remove transitions from your clips, but that depends on which of the next two processes you choose for moving your project to Resolve. If you choose the ProRes Workflow you'll probably want to leave them, if you choose the XML Workflow, you should remove them as it's possible they won't transfer back. 

Option 1: ProRes Workflow

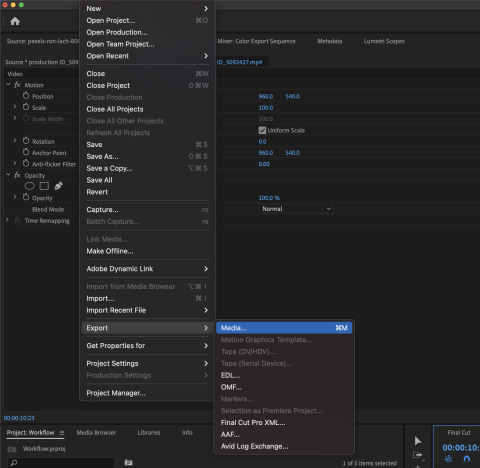
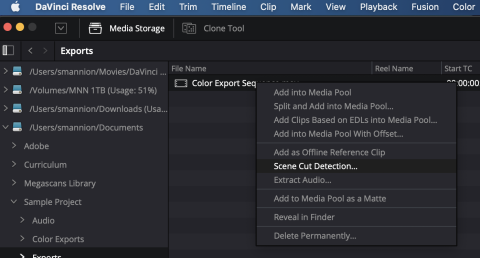
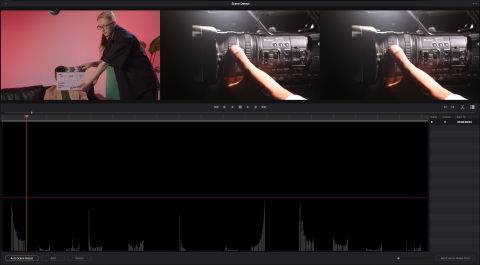
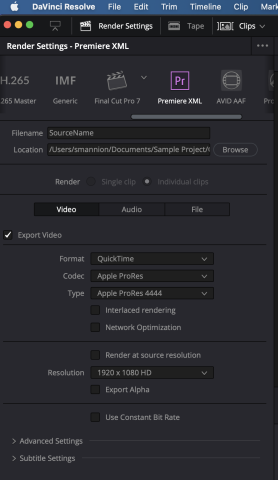
The ProRes Workflow involves exporting a single file from your "Color Export Sequence" and bringing that file into DaVinci to color grade it. You'll then export the sequence from DaVinci as a single file and import it into your Premiere project to finish. 

  1. After you finish preparing your sequence export the sequence as a ProRes 4444 file. Go to File > Export > Media and in the Export Settings choose Format Quicktime and Preset Apple ProRes 4444. Save it to an appropriate folder on your drive so you can find it to bring it into DaVinci.
    Screen shot showing the Export Media option in the Adobe Premiere menu
    Screenshot of the Premiere Export Window showing ProRes 4444 settings.
  2. You won't import the ProRes 4444 file directly into DaVinci Resolve. Instead, on the DaVinci Resolve Media Page for find the file in the Media Storage panel then right click it and choose Scene Cut Detection.
    Screen Shot showing the Scene Cut Detection option in the context menu in DaVinci Resolve
  3. The Scene Cut Detection window will open showing your project. Click on the Auto Scene Cut Detect button at the bottom of the window and DaVinci will analyze the edit. Note that Davinci is pretty good at identifying normal cuts, but it may have issues with transitions. Luckily you can use the Add and Delete buttons to remove or add any errors in the Auto Detect.
    Screen shot showing the Scene Cut Detection Window
  4. After you finish ensuring all of the cuts are identified in the clip click the Add Cuts to Media Pool button and you'll get clips in your Media Pool for the project for each of those clips. You'll need to reconstruct your timeline but it should be simple because you can sort the clips by their Start TC (starting Timecode) select them all and drag and drop them into the timeline and they should be added in order.
    Screen Shot of the Screen Cut Detection window in DaVinci showing cuts detected.
  5. Once you have the clips in the timeline, move to the Color page to do your color grading.
  6. To return to Premiere go to the Deliver Page and export the project as a a ProRes 4444 file, then import that file into Premiere to combine it with your sound mix and add back any other titles or effects that may be needed.
    Screen Shot showing the ProRes Master options in DaVinci Resolve's Deliver Page

If you're wondering why we're using ProRes 4444 instead of ProRes 422, it's because ProRes 4444 has more precise color sampling than 422. Since we're exporting for color grading, more precise color will be helpful.

Option 2: XML Workflow

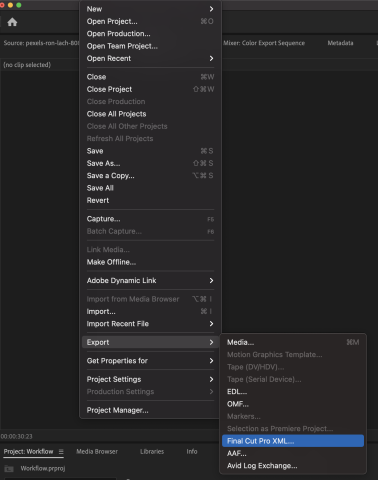
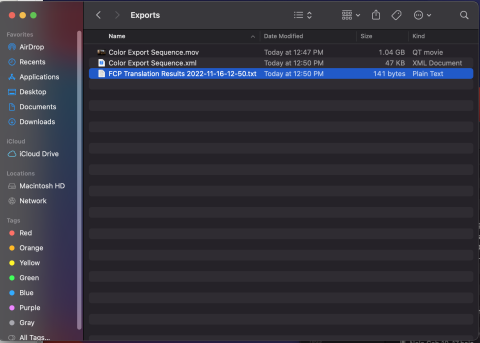
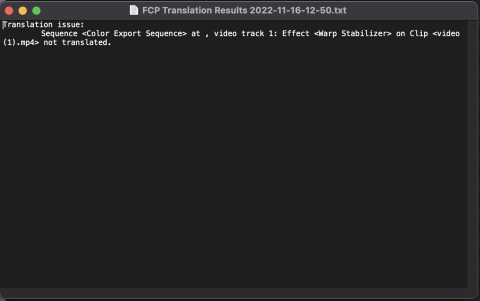
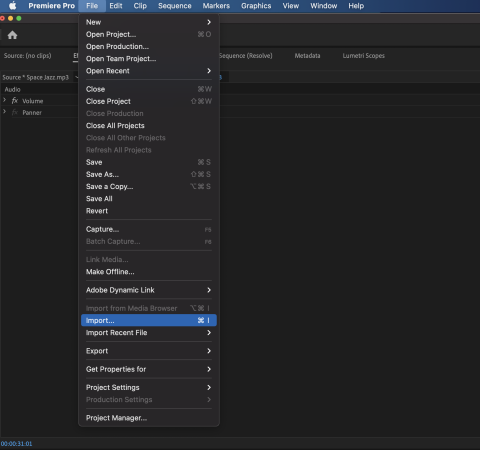
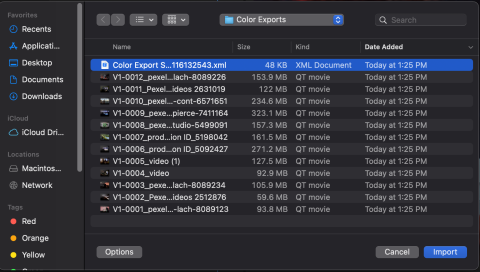
The XML Workflow involves exporting an XML of your sequence which DaVinci can read so you can easily re-create it as a timeline and work with the original files in the Color Page.

  1. After you finish preparing your sequence export the sequence as a ProRes 4444 file. Go to File > Export > Final Cut Pro XML ...  and save it to an appropriate folder on your drive so you can find it to bring it into DaVinci.
    Screen Shot showing the menu option in Premiere to export a Final Cut Pro XML
  2. After you save the XML you may want to check the XML results text file called "FCP Translation Results" that is saved alongside it. This file will tell you if anything didn't translate into the XML you generated. For example, Premiere's Warp Stabilizer effect won't be included in the XML. Remember this as you'll need to reapply effects like that to those clips when you bring the project back to Premiere.
    Screen shot showing the FCP XML Translation Results File Location
    Screen shot showing the FCP XML Translation Results Text File contents
  3. To bring this sequence into DaVinci you want to go to File > Import > Timeline. You may see the "Media from XML" option, but this won't give you the desired result. When you use the Timeline option it will import the sequence and all the media referenced in it into DaVinci.
    Screen shot showing where the import Timeline option is in DaVinci Resolve
  4. Open the imported XML timeline and do your color grading work in the Color Page.
  5. After you've finished grading the project go to the Deliver Page and choose the Premiere XML preset. This will export an XML file with the Timeline as well as every clip with the color grade as an individual clip. Save these to a folder with the rest of your media for the project.
    Screen shot showing the options to export a Premiere XML file from DaVinci's Deliver Page
  6. To get your project back into Premiere open Premiere and go to File > Import, then navigate to the folder you saved the XML file to. Choose just the XML file. This will import the sequence and all of the individual video clips to a new bin in your project. You can open this sequence and find the cut as you color graded it with all the work you did in DaVinci. You can use those clips to finish your project in Premiere now.
    Screen shot showing how to find the Import option under the File menu in Adobe Premiere
    Screen shot showing where the Premiere XML export is saved to

You can find a similar workflow to this XML Workflow on the Frame.io blog. As with many things in content creation, there is not just one way to get from point A to point B. Always use the method that works best for you and the project you're working on rather than trying to force your project into a workflow that doesn't make sense for you. 

Why choose one of our options over another? Like many situations in post production the answer of which workflow to use often comes down to personal preference, but there can be other reasons as well. If you are doing your color grading on a separate computer from where you did your edit, the ProRes Workflow is a little bit easier, as you're just dealing with a single file you need to move instead of all of your project files, which would be the case with the XML Workflow. The XML Workflow will likely be a bit faster and more accurate otherwise, since you won't have to identify where your cuts are as with the ProRes Workflow and you'll also be working off of your original files instead of an export from Premiere. 

These workflows also assume you're planning to do your own color grading in DaVinci Resolve. If you're working with a colorist who will be doing this finishing for you, talk to them about what works best for them. They may prefer DNxHD to ProRes or want you to prep your timeline a little differently. You will likely also want to export a version of your edit with burned-in timecode as a reference. What's important if you're working with a colorist, though is communication. Talk to them about what they need and discuss with them in detail what look you want for the final color grade.

For more information, tips and tricks visit www.mnn.org/learn for free workshops, professional courses, filmmaking intensives, and more resources to make your productions successful. 

Want more? Click here for our in-person classes!