
DaVinci Resolve has become one of the leading applications for color correcting videos, movies, and digital series. This freemium software offers powerful fully functional color correction and color grading software that can work either as an entirely software-based solution on a powerful laptop or connected to BlackMagic's consoles in a fully functional post-production studio.
While there are some incredible features reserved for the paid version, most everyday color correction tasks are available in the free version.
Before we jump into how to color correct in DaVinci, let's talk about the basics of color correction itself.
Color correction is the process of adjusting and correcting color temperature, skin tones, lighting, exposure, and contrast in your video images that distract from the visual world that you are intending to create for your audience.
The goal is to achieve a proper exposure level to ensure viewability and make sure that the visual qualities of each sequential shot in a scene matches the previous one. This helps maintain continuity throughout a scene(s).
It is helpful to first adjust our images to achieve a nice, even baseline look. Later we can focus on creating a more specific look that further contributes to the tone, feel and genre. If we're working on a romcom, for example, and the lighting during production accidentally cast green hues on the actors and was too dark, we may want to correct the images to create a more lighthearted atmosphere with fewer shadows and more even skin tones. (NOTE: It's easy to say "We'll just fix the color in post." It's MUCH easier to get it right on set by lighting and shooting it properly, making only minor adjustments in post.)
The Color Page in Resolve's interface has several areas that work together to let us grade our clips quickly and easily, so that's where we'll start.
Some basic tips and tricks:

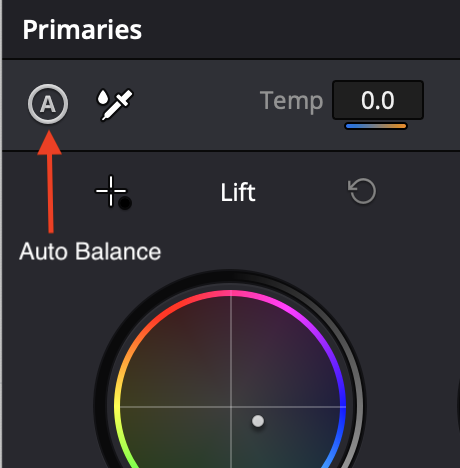
To adjust the brightness of our image, start by trying the Auto Balance button (the A button). This tool will automatically adjust the shadows, midtones, highlights, and color temperature of our footage to achieve a more uniform look. While Auto Balance balance is a useful tool, we'll want to use manual adjustments in order to have greater control over and make necessary tweaks. Auto Balance alone is not always reliable for achieving our end goals.
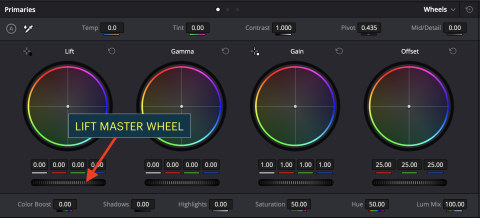
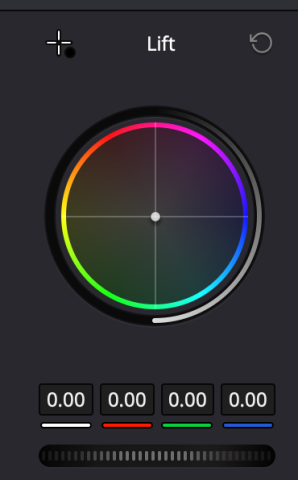
To manually adjust the brightness of our image, go to the Color Wheels. The best way to see what the color wheels do is to dig right in and start playing with them.
For a more in-depth description of how these wheels work and what areas they adjust, check out our friends at Premium Beat: https://www.premiumbeat.com/blog/color-wheel-basics/
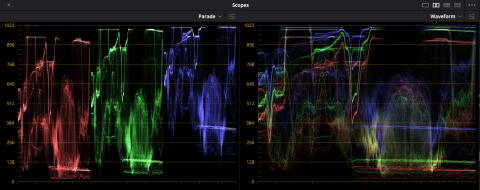
Using the Scopes tools helps make sure our video looks consistently great across a variety of devices and screens, especially since color & exposure can vary from screen to screen.
Scopes provide an accurate representation of exposure and tonal range.

Go to Scopes and select the Waveform scope. Where the waveforms are located on the scopes indicate the brightest and darkest parts of the image. If the waveforms fall below zero or above 1023, it is often a sign that parts of our image are too dark and/or too bright and that it is losing visual information.
When we raise the Lift, the waveform will rise and part of the trace that was previously located under zero, elevates, signifying that the details that were lost in the shadows have returned to the image. Now that we have raised shadows that previously fell below zero, the waveform in the Waveform monitor has shifted upwards, revealing more visual information.
There are many BlackMagic tutorials that explain how to properly use the scopes if you want to dive deeper.
Here's a great starter tutorial from B&H:
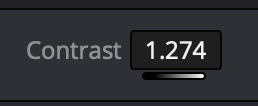
Adjust Contrast: After normalizing the exposure, we may notice that the image looks a bit flat and is lacking contrast. Adjusting contrast enables us to increase or decrease the difference between light and dark areas in an image. Beyond making our images more visually interesting, it's important to have enough contrast to properly assess the color balance as we go to make further corrections.
Go to the Contrast option towards the top of the Primaries window. We will increase the contrast until our image is easier to evaluate. When adjusting contrast at this stage, a little goes a long way. Remember, at this stage we are trying to achieve a baseline image in preparation for color grading at a later point. Begin with subtle adjustments. We can always further adjust your look later on.

Color Balance: If Auto Balance has not successfully adjusted our color balance to our liking and/or we still need to make tweaks, use the Primary Color Wheels to adjust the image. Aim to make the skin tones look natural.
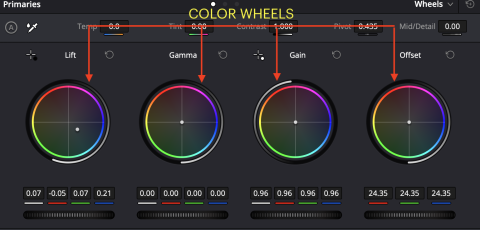
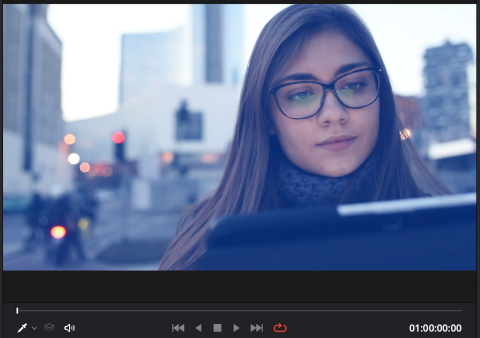
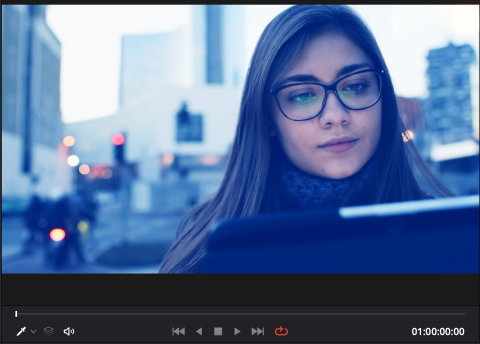
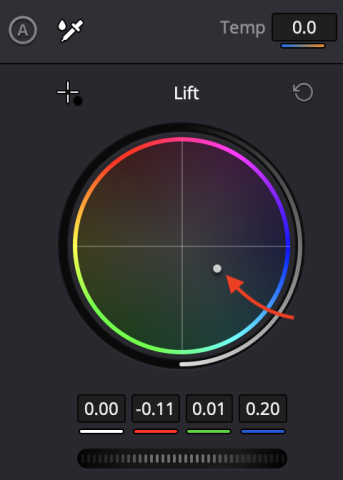
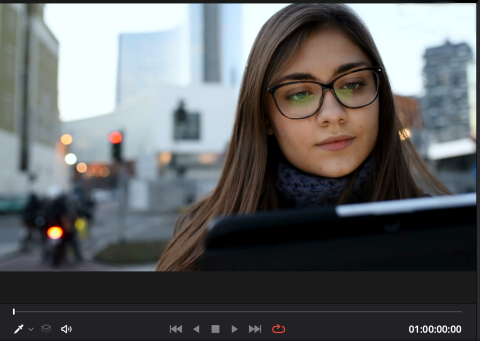
If we go to the Color Wheels, we will notice that under Lift there is a grey dot. This enables us to adjust the color balance based on which color we drag it towards. Looking at our example image in the viewer, we should notice a blue overcast. To eliminate it, let’s click and drag the grey dot in the opposite direction of blue, towards yellow and red to create a more natural skin tone and image. Whichever colors are favored in the color wheel will dictate the color temperature that is cast on the image in the viewer.
Congratulations!
We've just applied some of the some basics of color correction. Remember, this is just a brief overview of the Color page. If we were going more in-depth, we would look at using nodes for establishing a non-destructive workflow and the other scopes that we can use to achieve preferred results. Be sure to investigate nodes, scopes and other elements of color correction. Becoming a color correction specialist will take some time but the benefits will be huge.
For more information, tips and tricks visit www.mnn.org/learn for free workshops, professional courses, filmmaking bootcamps, and more resources to make your productions successful.