

After your video shoot when you begin reviewing your footage, you may realize that some of your audio is not as cleanly recorded as you would like. It is always ideal to record pristine audio in the field rather than attempting to correct it in post. However, there are some strategies that you can utilize in Adobe Premiere that will enable you to cut down unwanted background audio noise.
Start by trying these tips to clean up your audio.
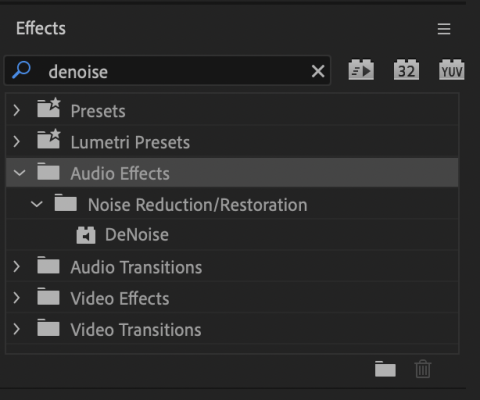
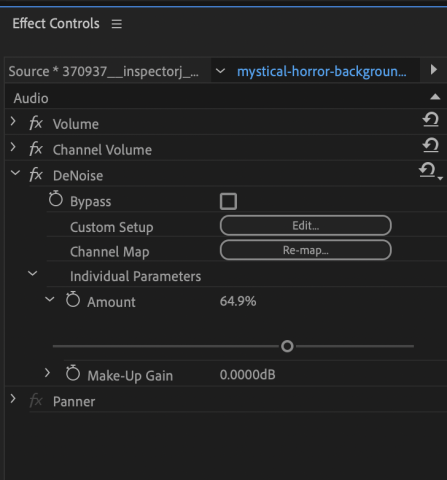
Use the DeNoise Effect:
While Premiere’s DeNoise effect can’t always save poorly recorded audio tracks from extremely loud environments, it is a powerful tool that can clean up audio with a faint hiss or noise.
To utilize the DeNoise option for quick minimal cleanup:

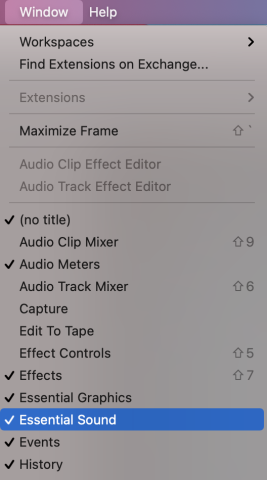
Use the Essential Sound Panel Dialogue Repair Option:
Premiere’s Essential Sound Repair option provides a variety of ways to clean up noisy dialogue, remove unwanted background noise, and will provide you with more flexibility than the DeNoise effect (described above) for specific dialogue cleanup needs.
To utilize Essential sound:
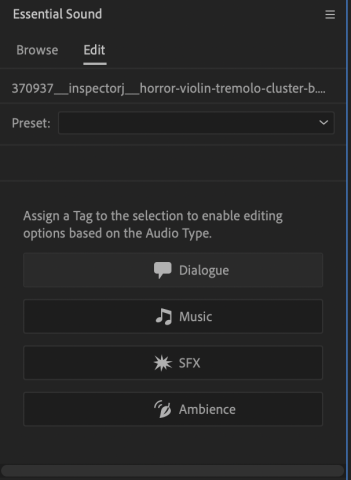

As a jumping off point, a few helpful audio repair options within Essential Sound include:
Reduce Noise: Premiere’s noise reduction function aids in isolating certain unwanted ambient frequencies.
Clean up noise by checking the box next to Reduce Noise. Then, use the slider to reduce noise as needed. Remember, don’t reduce too far or your audio may sound unnatural, defeating the purpose of noise reduction.
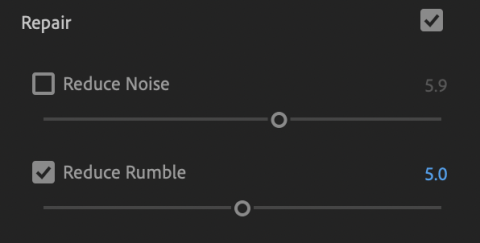
Reduce Rumble: This function comes in handy when trying to isolate and remove sounds of a car rumble, a microphone that was knocked around during production, scratching noises or (minimal) wind. Select the Reduce Rumble checkbox and adjust as needed.
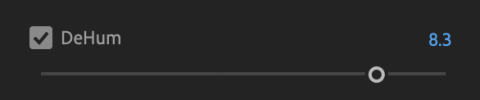
DeHum: The DeHum option will aid in removing low frequencies that are prevalent in common background noises such as a low fridge or computer hum.
Reduce Reverb: If you have recorded audio in a room that does not absorb sound well, you may be able to eliminate some of the reverb in the space to make the dialogue sound more natural. Just remember, this plugin will not save audio recorded in extreme conditions.
This is just a beginner’s guide. You can always dive deeper into Premiere audio correction techniques. There are a variety of tools that require a bit more knowledge to use but can aid in cleaning up audio. Also, remember, the best way to achieve clean audio is to record it cleanly during production.
For more information, tips and tricks visit www.mnn.org/learn for free workshops, professional courses, filmmaking bootcamps, and more resources to make your productions successful.