

When creating content we will come across situations that require us to take some actions in regards to elements in our projects like lighting. Whether it’s an interview, a round table discussion, or a segment to a show, our main goal is to make sure that our on camera talent is well lit. Here are some tips to help you achieve your goals of proper lighting for your video projects.
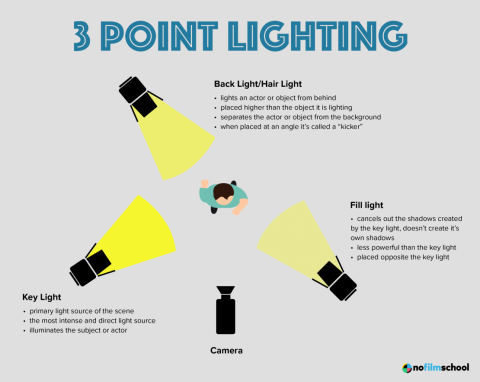
3-point lighting is a technique that when done correctly will enhance your project. 3-point lighting consists of a Key Light, Fill Light and Back Light. Now combine your camera and talent, as you can see in the accompanying photo, you create an environment that provides even lighting for your subject. The Key Light is your primary light source for the scene. The Fill Light cancels out shadows created by the Key Light. The Back Light is also known as the Hair Light and Kicker. This lights separates the subject from the background.
Before filming, inform your talent of what colors they should and should not wear. Dark colors absorb light, while lighter colors reflect light. The same concept applies to skin tone as well. Also, remind your talent that shiny jewelry reflects light to a high degree. Now that you have the recipe for 3 point lighting, go out and try it. Remember, don’t be afraid to experiment with various types of light including the available light in the space. This process requires some trial and error so keep at.
If you want to learn more about how to light your video projects, sign up for our online Lighting Home Studios workshop on Friday, August 21st. Register today and visit mnn.org to learn how you can get involved with Manhattan Neighborhood Network.