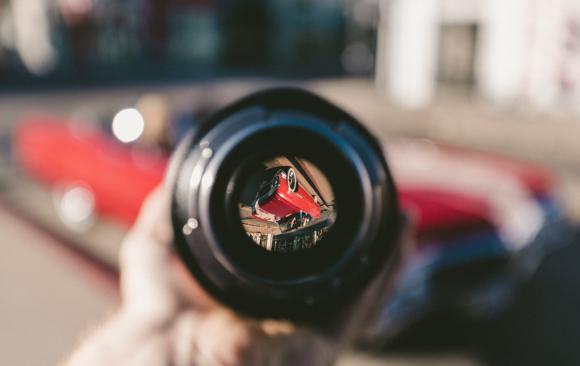
There are many advantages to achieving a shallow depth of field when shooting a scene with your camera. A shallow depth of field places a particular subject in sharp focus while ensuring that the background or foreground of the image is blurred. This technique may point an audience’s attention towards the most important subject in a scene, while placing less emphasis on blurrier less focused objects. This approach may also aid in achieving a particular aesthetic that serves the story that you are trying to tell.
Remember, effectively achieving a shallow depth of field often requires planning and specific calculation. Follow these four tips to achieve a crisp shallow DOF that will aid in telling your visual narrative.
- Open up your aperture: The aperture is an adjustable opening at the back of your lens that affects how much light is let through the lens and falls on the camera's image sensor. Essentially, the size of your aperture and thus, how much light is let in contributes to how bright or dark your final image will be.
When shooting in darker environments, it is beneficial to open up your aperture to let more light into your camera so that your image is bright enough and not underexposed. An additional benefit (if desired) is that when you open up your aperture and more light is let in, a shallower depth of field on a subject is achieved.
You will know that you are filming with a wider aperture when the f-stop on your lens is set to smaller numbers such as f/2.8. Conversely, when you let less light in, your aperture number will be larger such as f/22, and you will achieve a deeper depth of field.
- Adjust the distance between subject and lens: The closer your subject is to your camera lens, the shallower the focus will be in front of and behind the subject. If you bring your subject further away from your lens, the focus will be deeper. This rule also applies when you are using a zoom lens. If you zoom in all the way on a subject, the focus will be shallower and vice versa when you zoom out.
- Position your subject away from a background: If your subject stands right in front of a wall or background, the background will most likely be in focus since the focus point for both is similar. However, distancing your subject away from their background, will enable you to achieve a shallow focus on your subject.
- Be aware of your sensor size: Your camera’s sensor size impacts your ability to create a shallow depth of field. Larger sensor sizes create a wider field of view. A smaller or crop sensor only captures a portion of what a full sensor can capture when using the same lens focal length. When looking through the viewfinder of a full frame sensor camera versus a crop sensor, the crop sensor will produce an image that looks magnified in comparison to a full frame. Thus, because the cinematographer will need to move their full frame sensor camera closer to the subject to duplicate the closer or more “magnified” field of view of a crop sensor, the resulting image will have a shallower depth of field. The shallow depth of field is due to the distance between subject and lens adjustment (from tip #2 above).
Intentionally creating a shallow depth of field can take some practice, but once you figure out the basics, the process will become second nature. The good news is that you can practice achieving a shallow DOF with just a camera and nearly any object that is available to you, whether it is a chair, desk or car.
For more information, tips and tricks visit www.mnn.org/learn for free workshops, professional courses, filmmaking bootcamps, and more resources to make your productions successful.


