

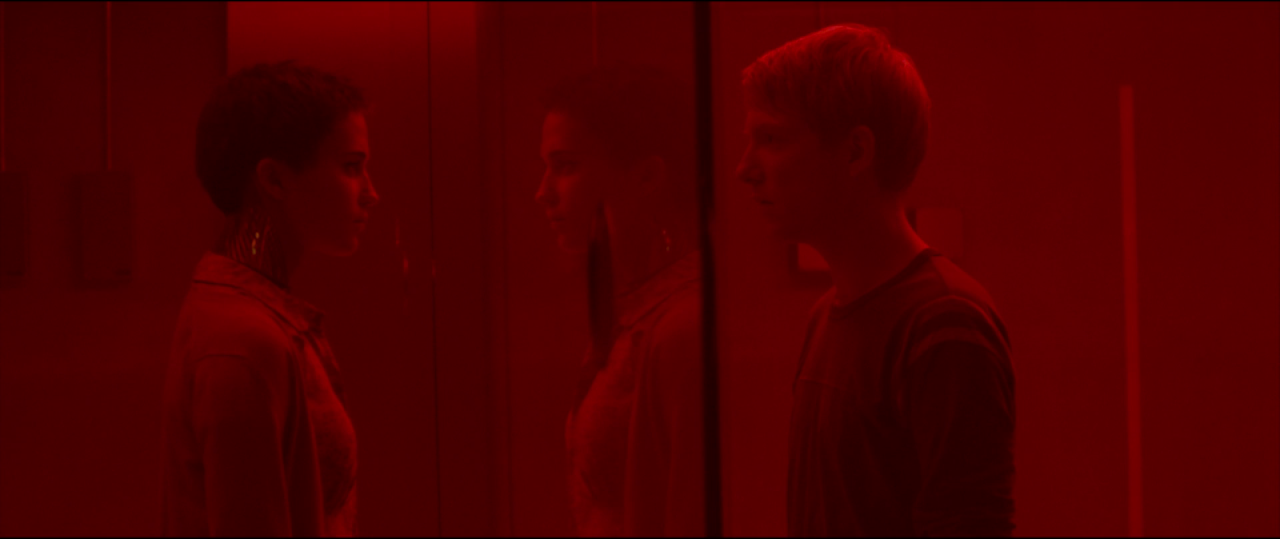
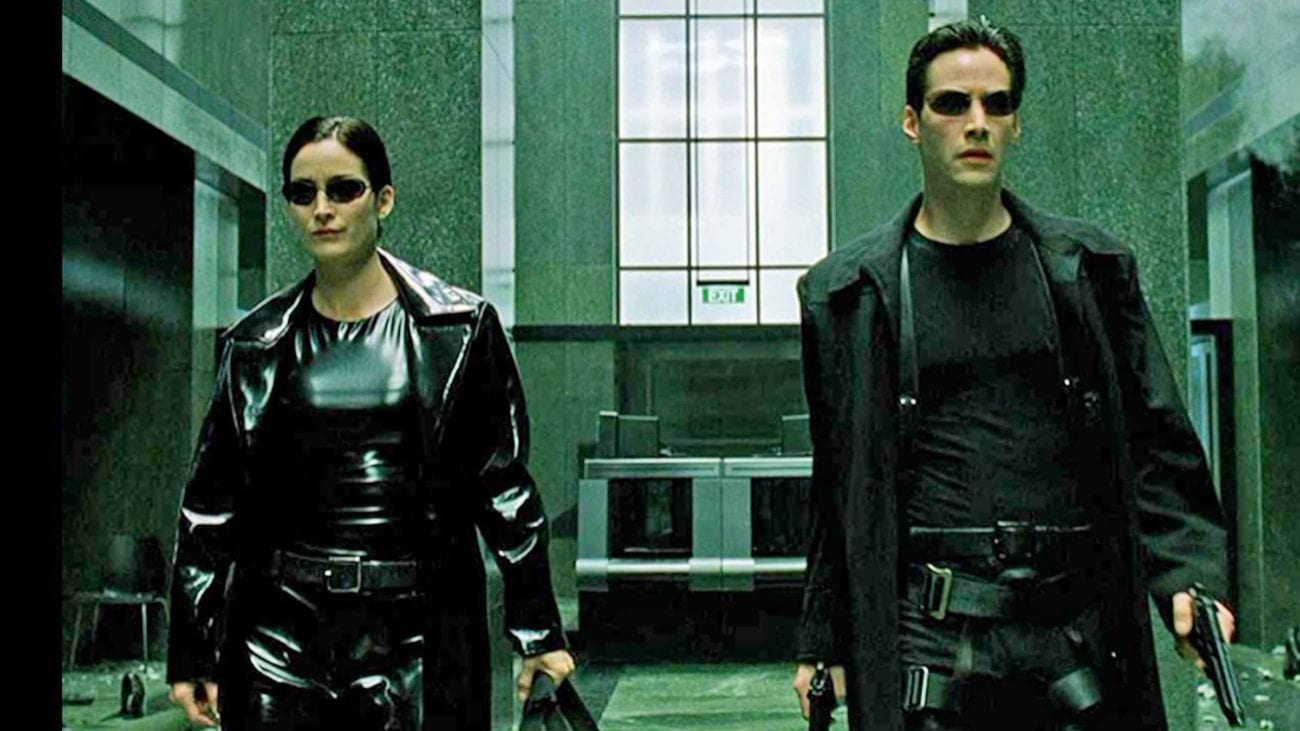
The color of your video content can dramatically impact the quality and tone of the project. Whether it's tints of red, which was used in Ex Machina to show aggression and anger, or The Matrix's use of green hues to express new life and survival, coloring can affect mood, manipulated emotion, and is a critical component of the post-production process.
Coloring encompasses color grading, a process of enhancing the look of your footage for creative purposes to achieve a certain aesthetic. The process is typically completed by a colorist and occurs after color correction. While color grading and color correction are often used interchangeably, they're very different. Color correction involves "balancing" the image by adjusting exposure, contrast, and shadows to fix mistakes or make the image appear more natural. While color grading requires skill, basic color correction, a type of color grading, can be performed by anyone. Here we'll walk through everything you need to know about Adobe Premiere Pro CC's basic color correction.
Here's an example of footage captured with incorrect color temperature. The footage also is blue and is slightly underexposed.

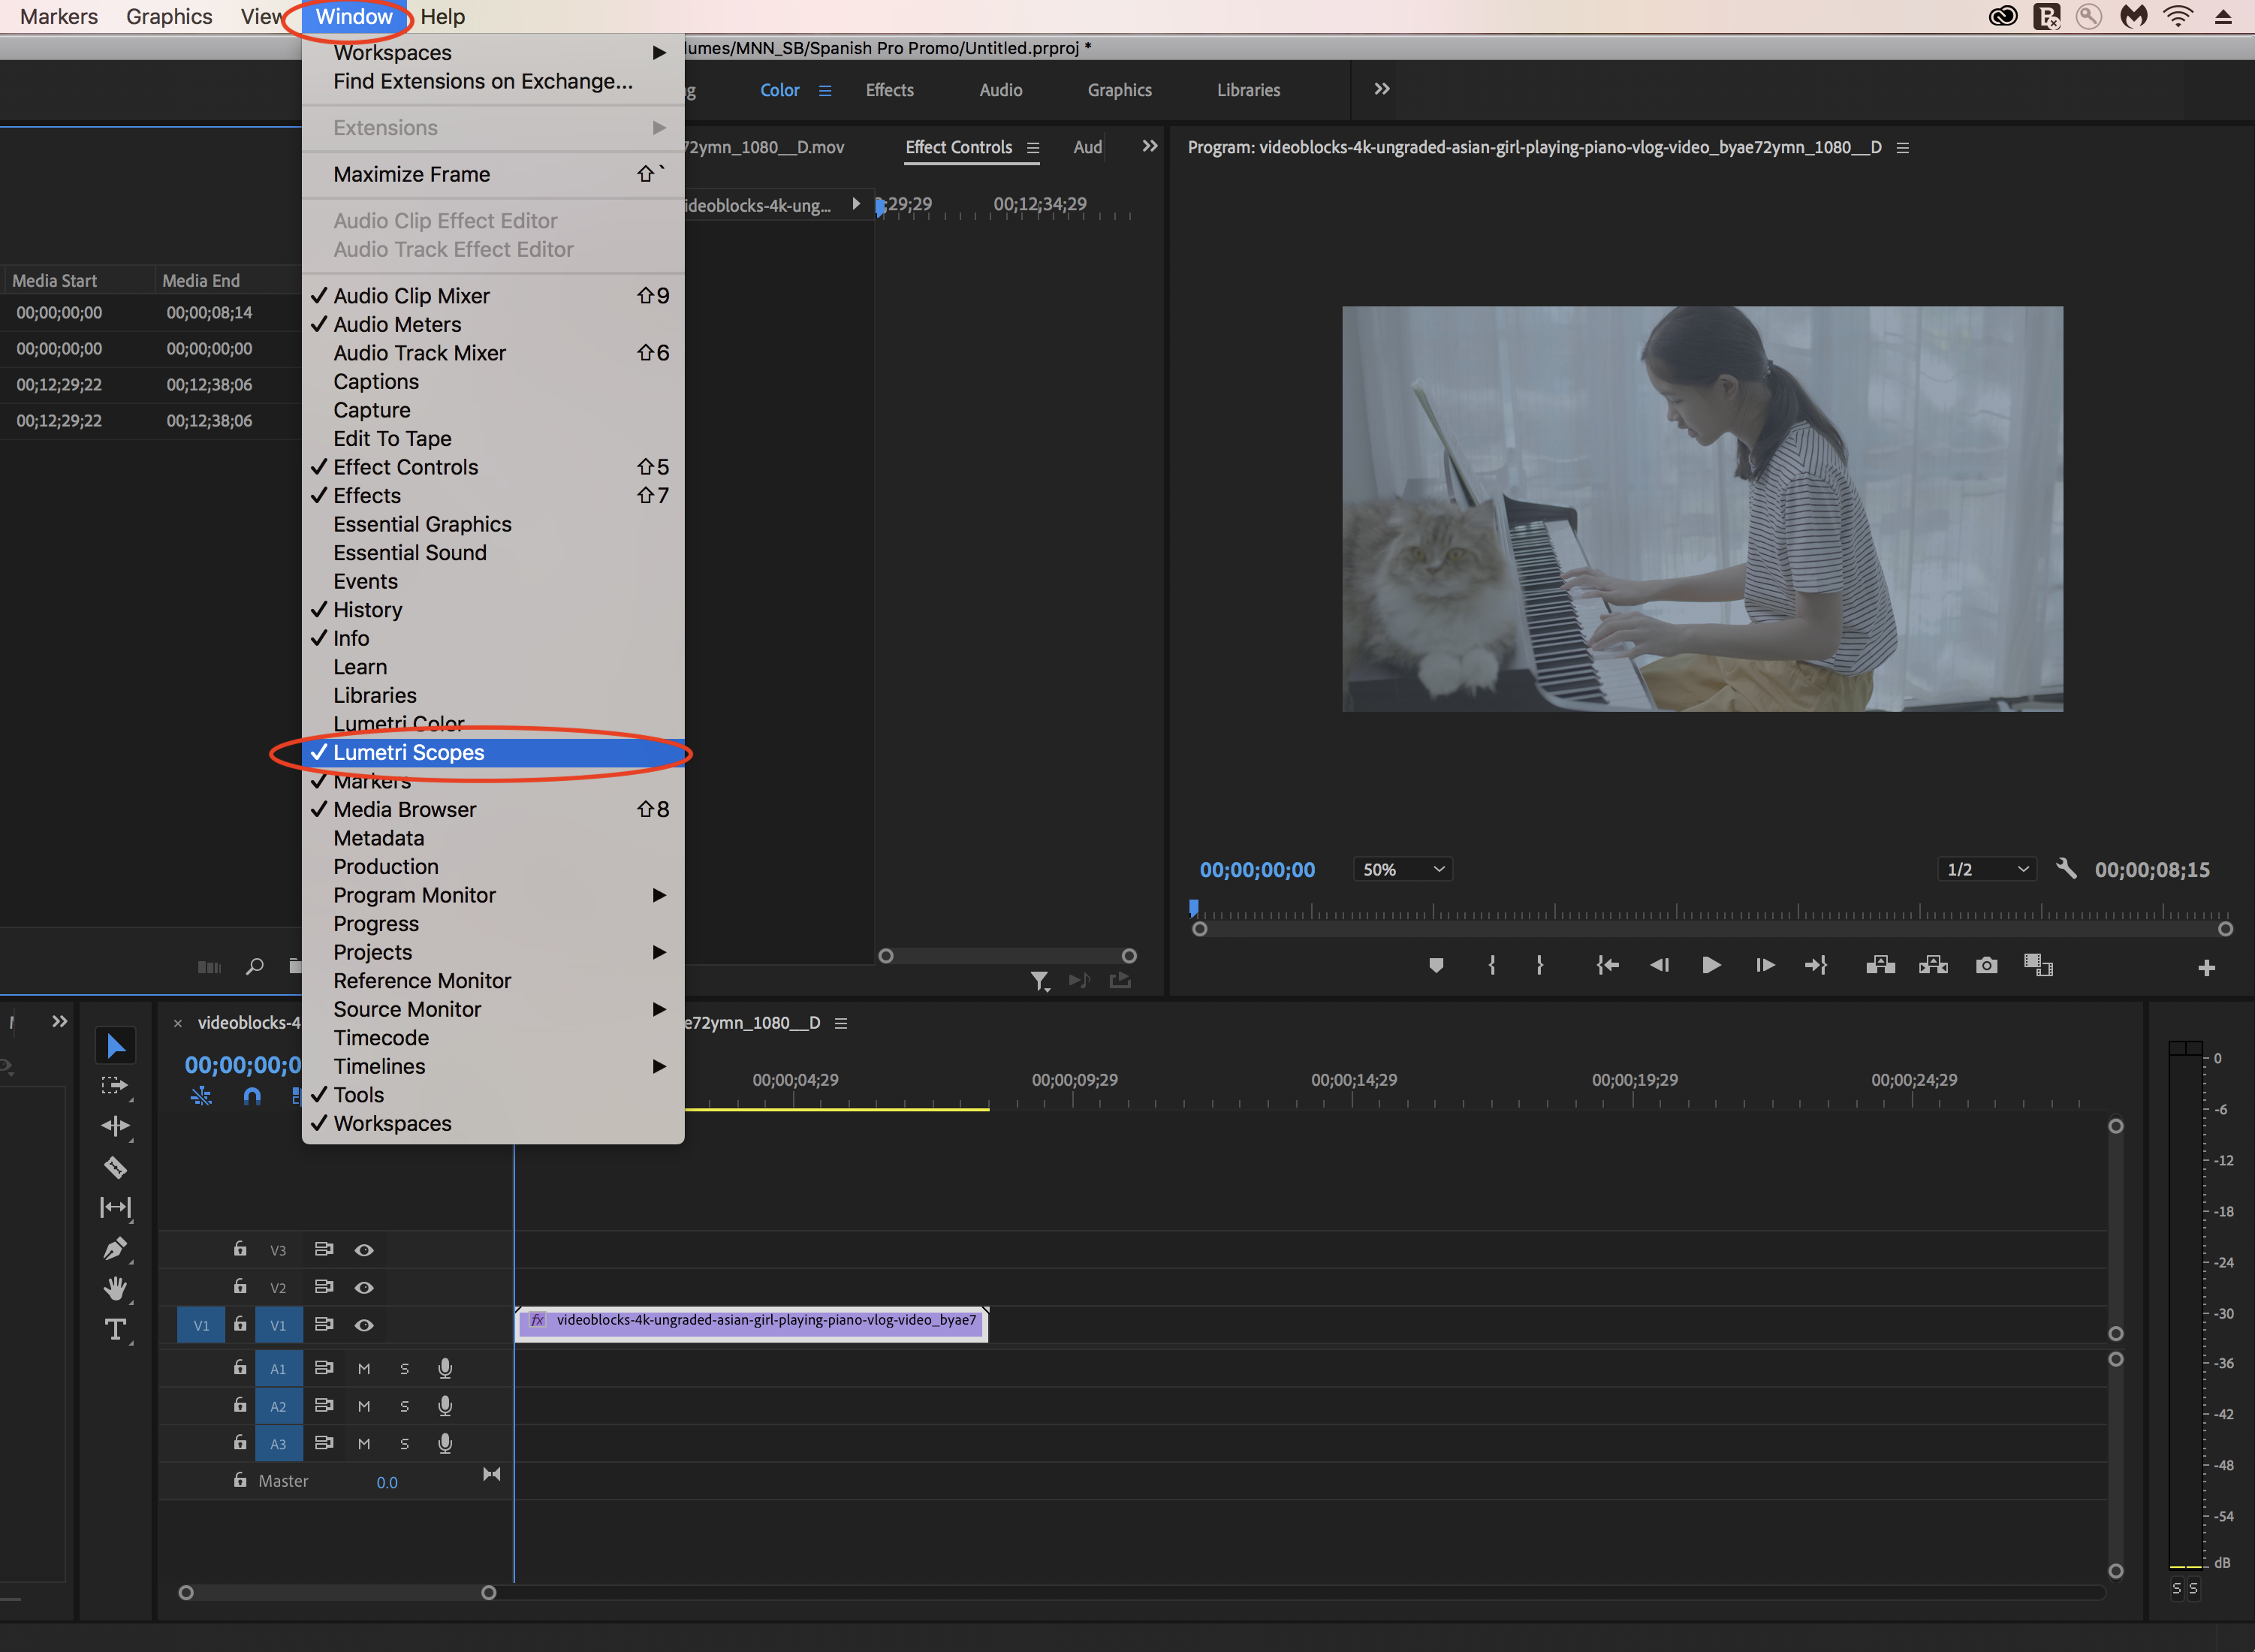
STEP 1: With the footage imported into Premiere Pro and a sequence created, open the Lumetri Color Panel window by going to Window at the top of the Premiere screen, then click on Lumetri Color.
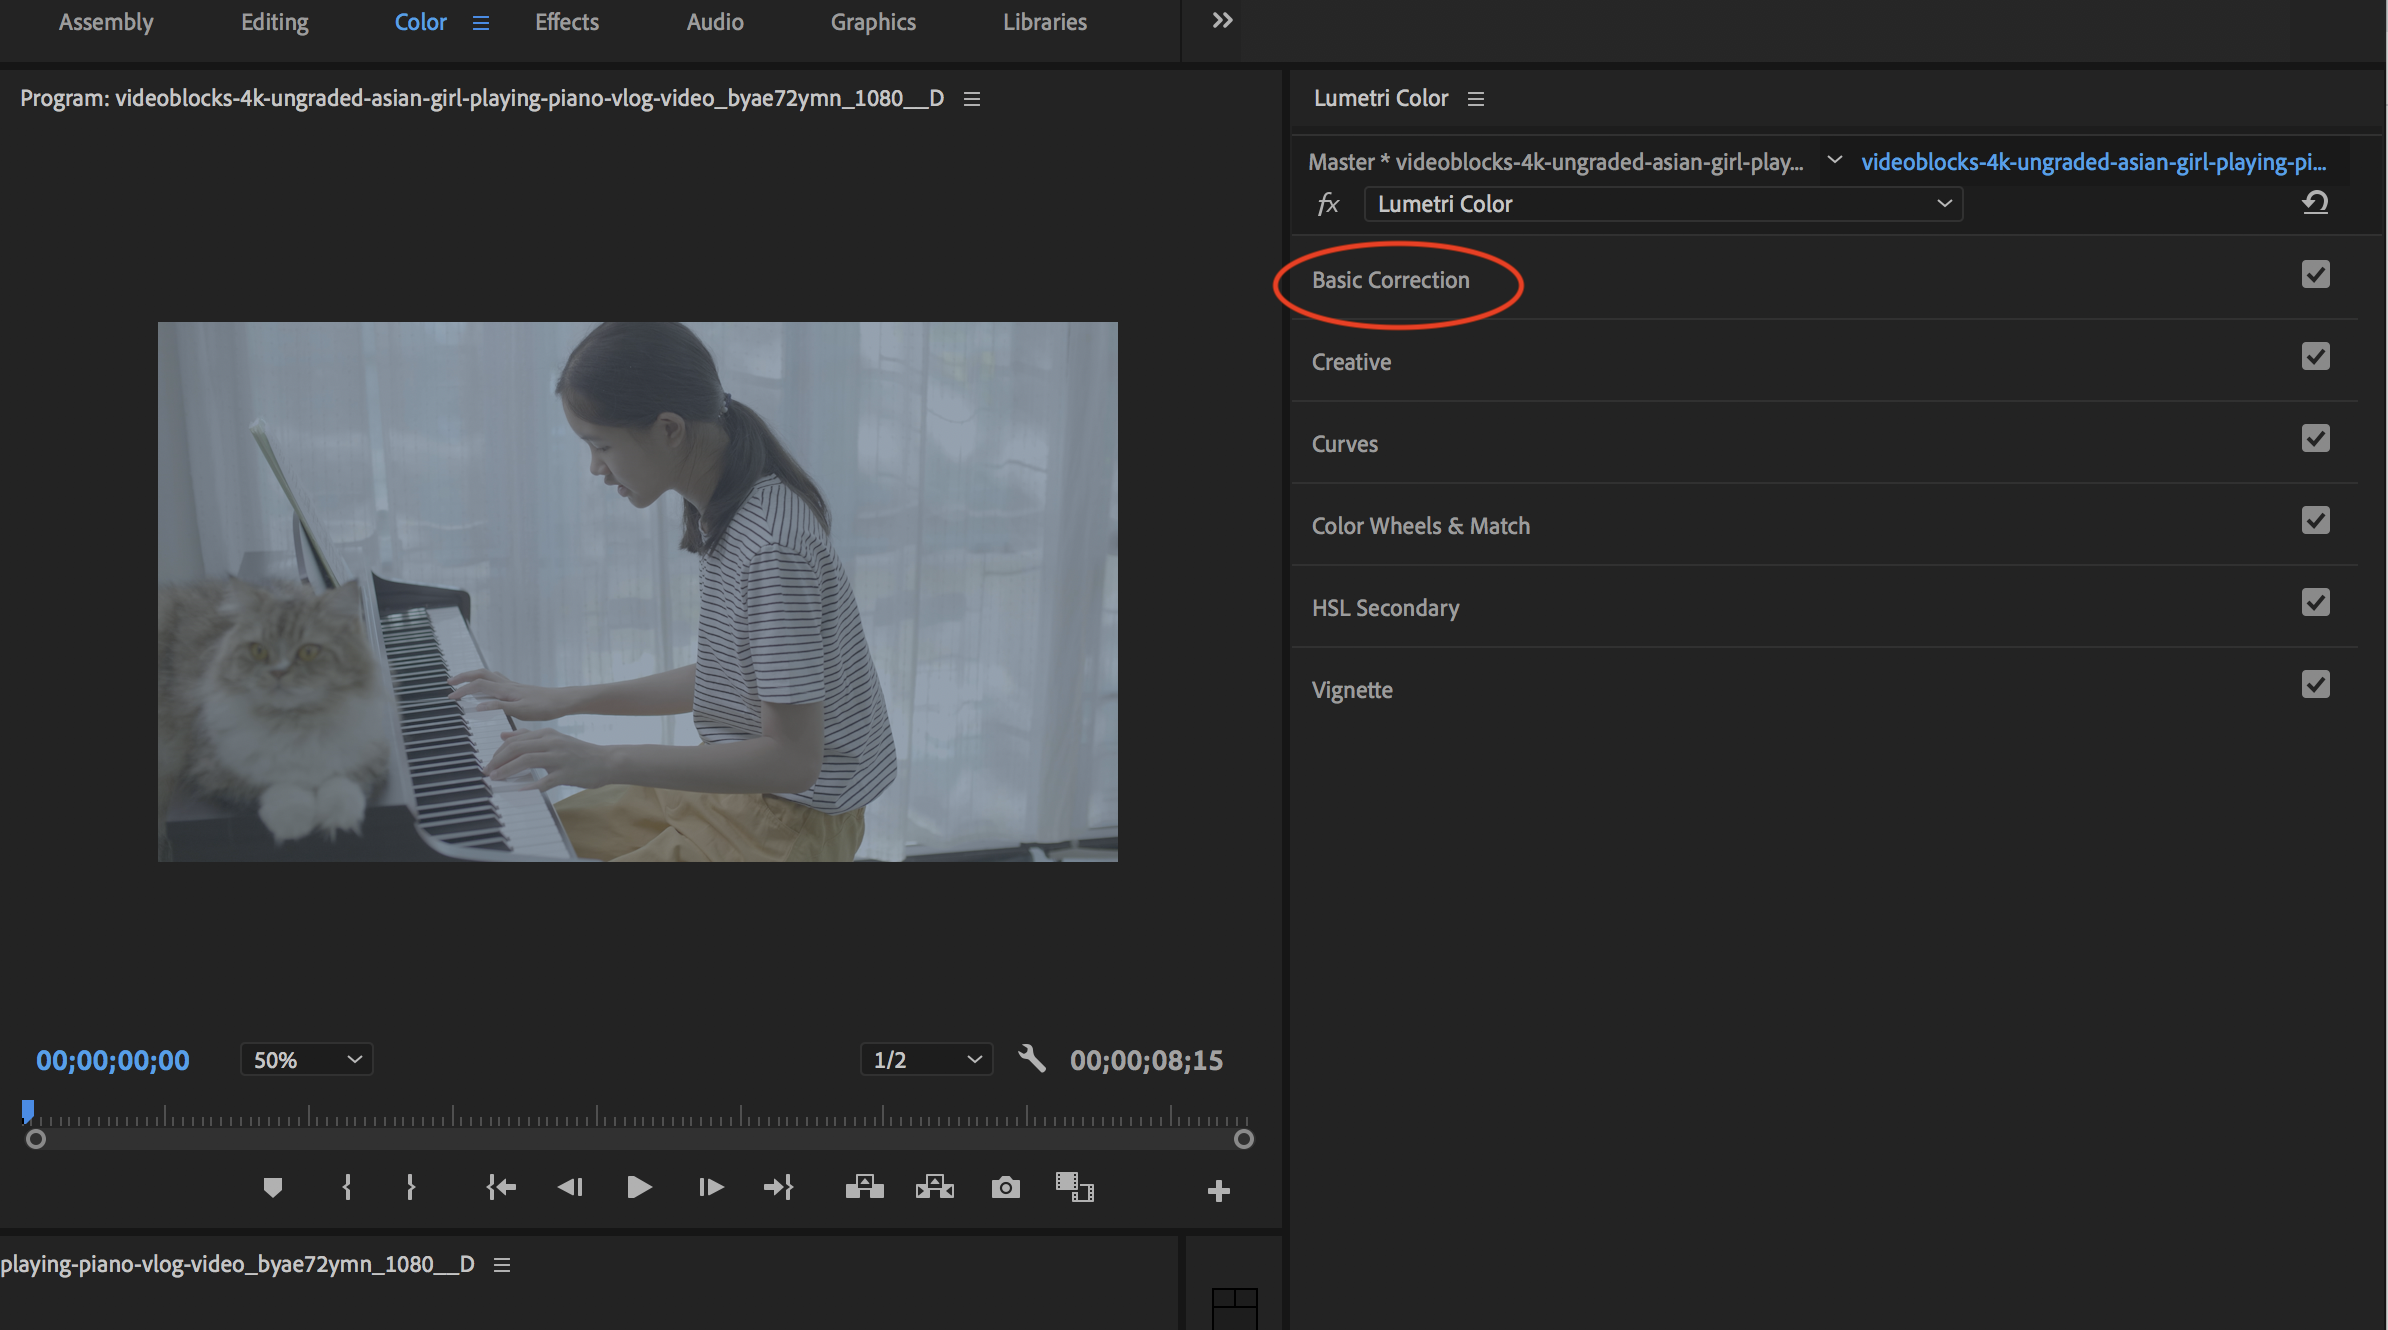
STEP 2: Open the Basic Correction tab inside the Lumetri Color panel window to reveal all of the main color correction options.
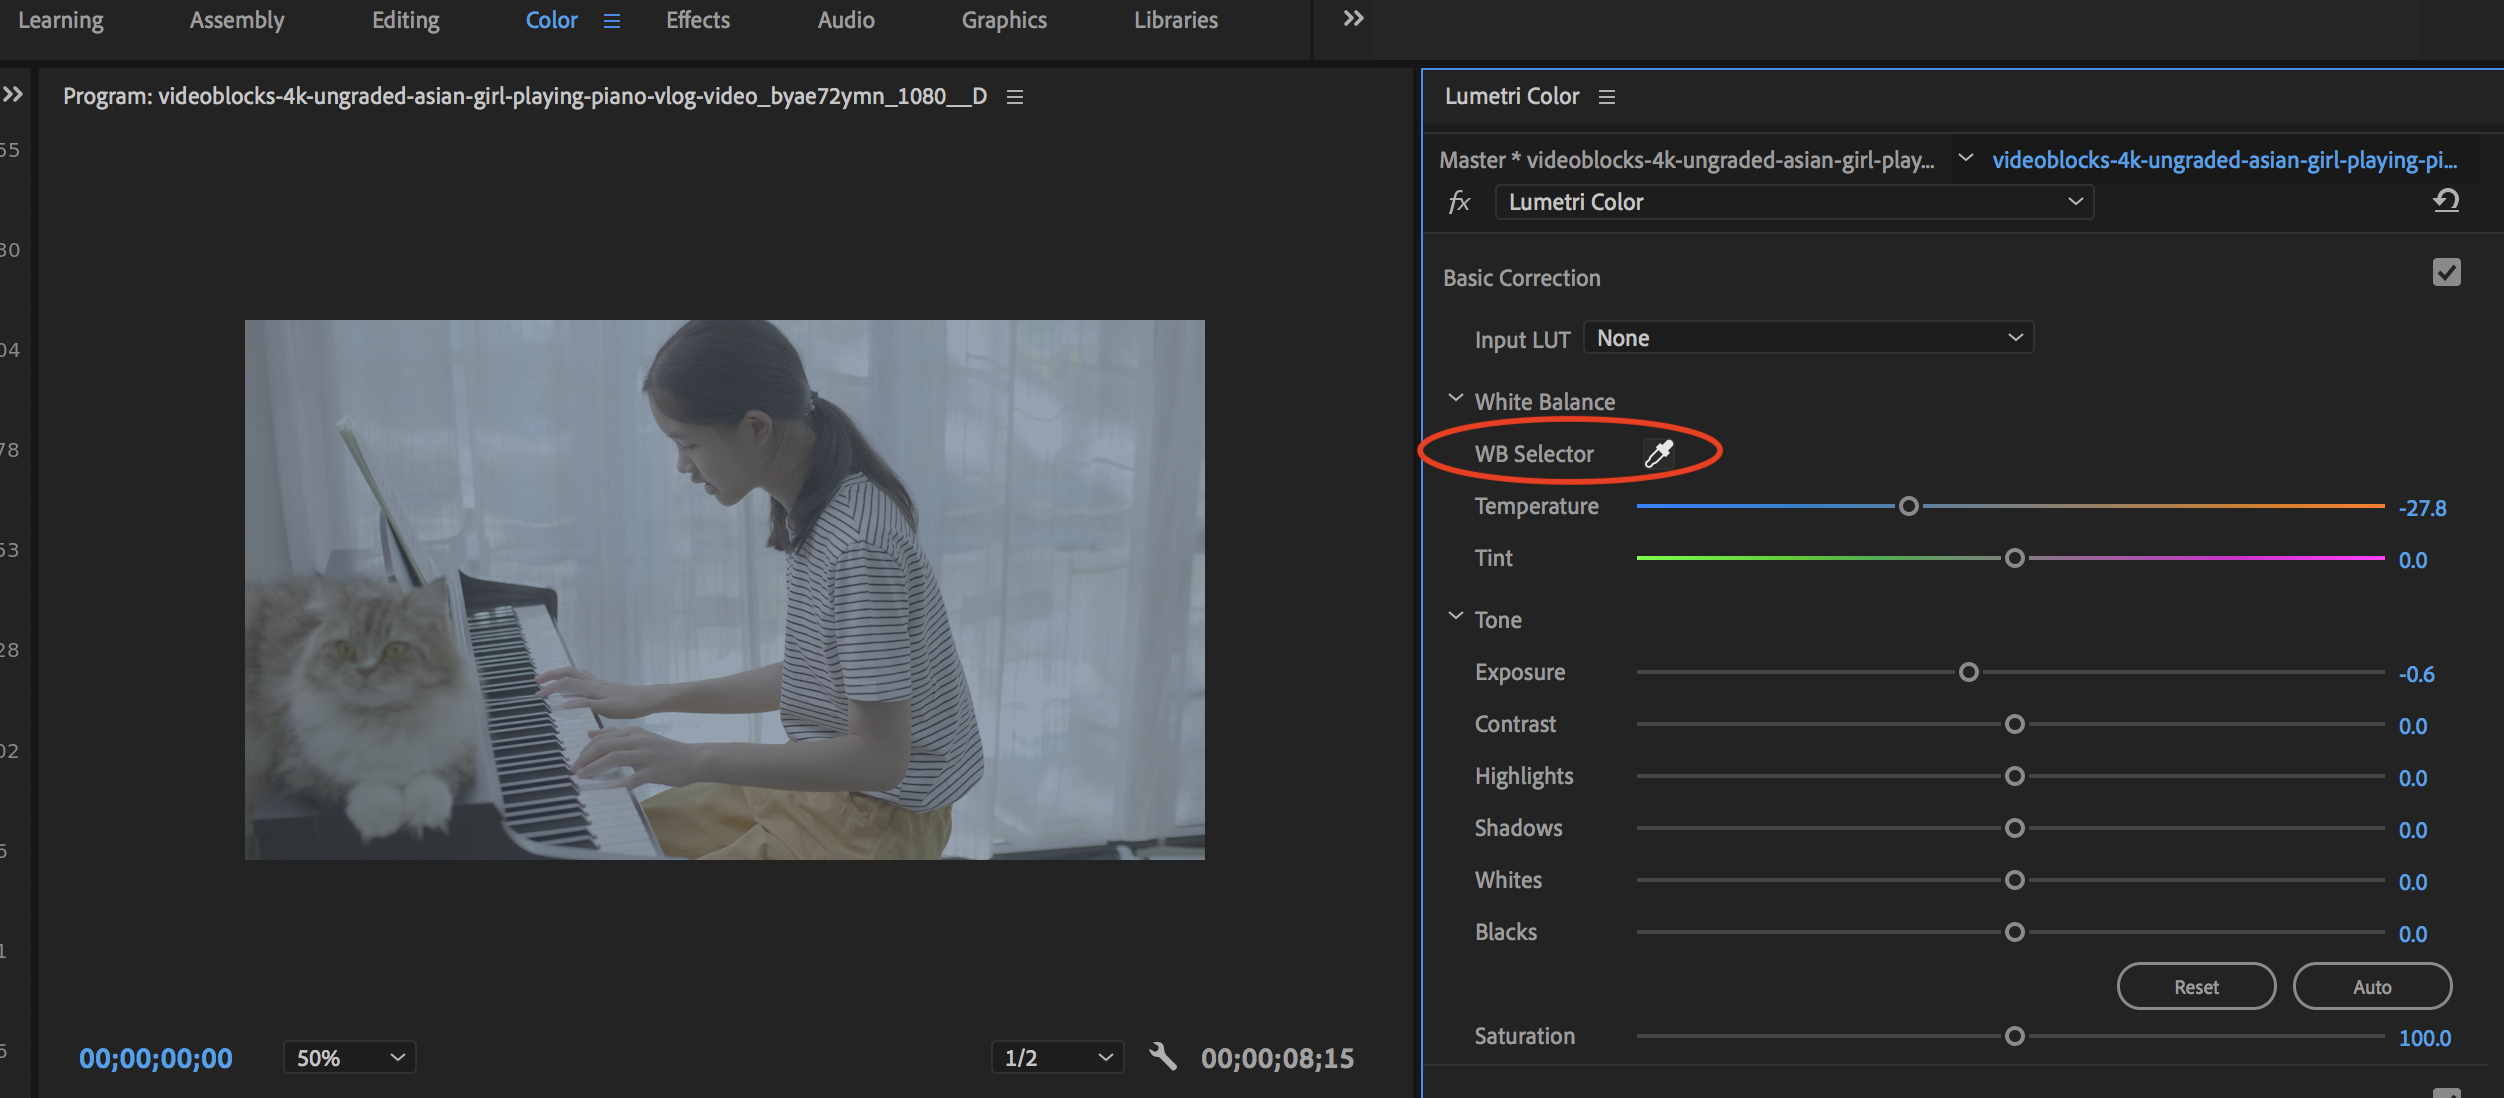
STEP 3: To color correct this clip, we will start with the overall color. Since the footage is blue, we will correct it by using the WB Selector under the White Balance section. By selecting an area of the frame closest to white, Premiere will automatically balance the image.
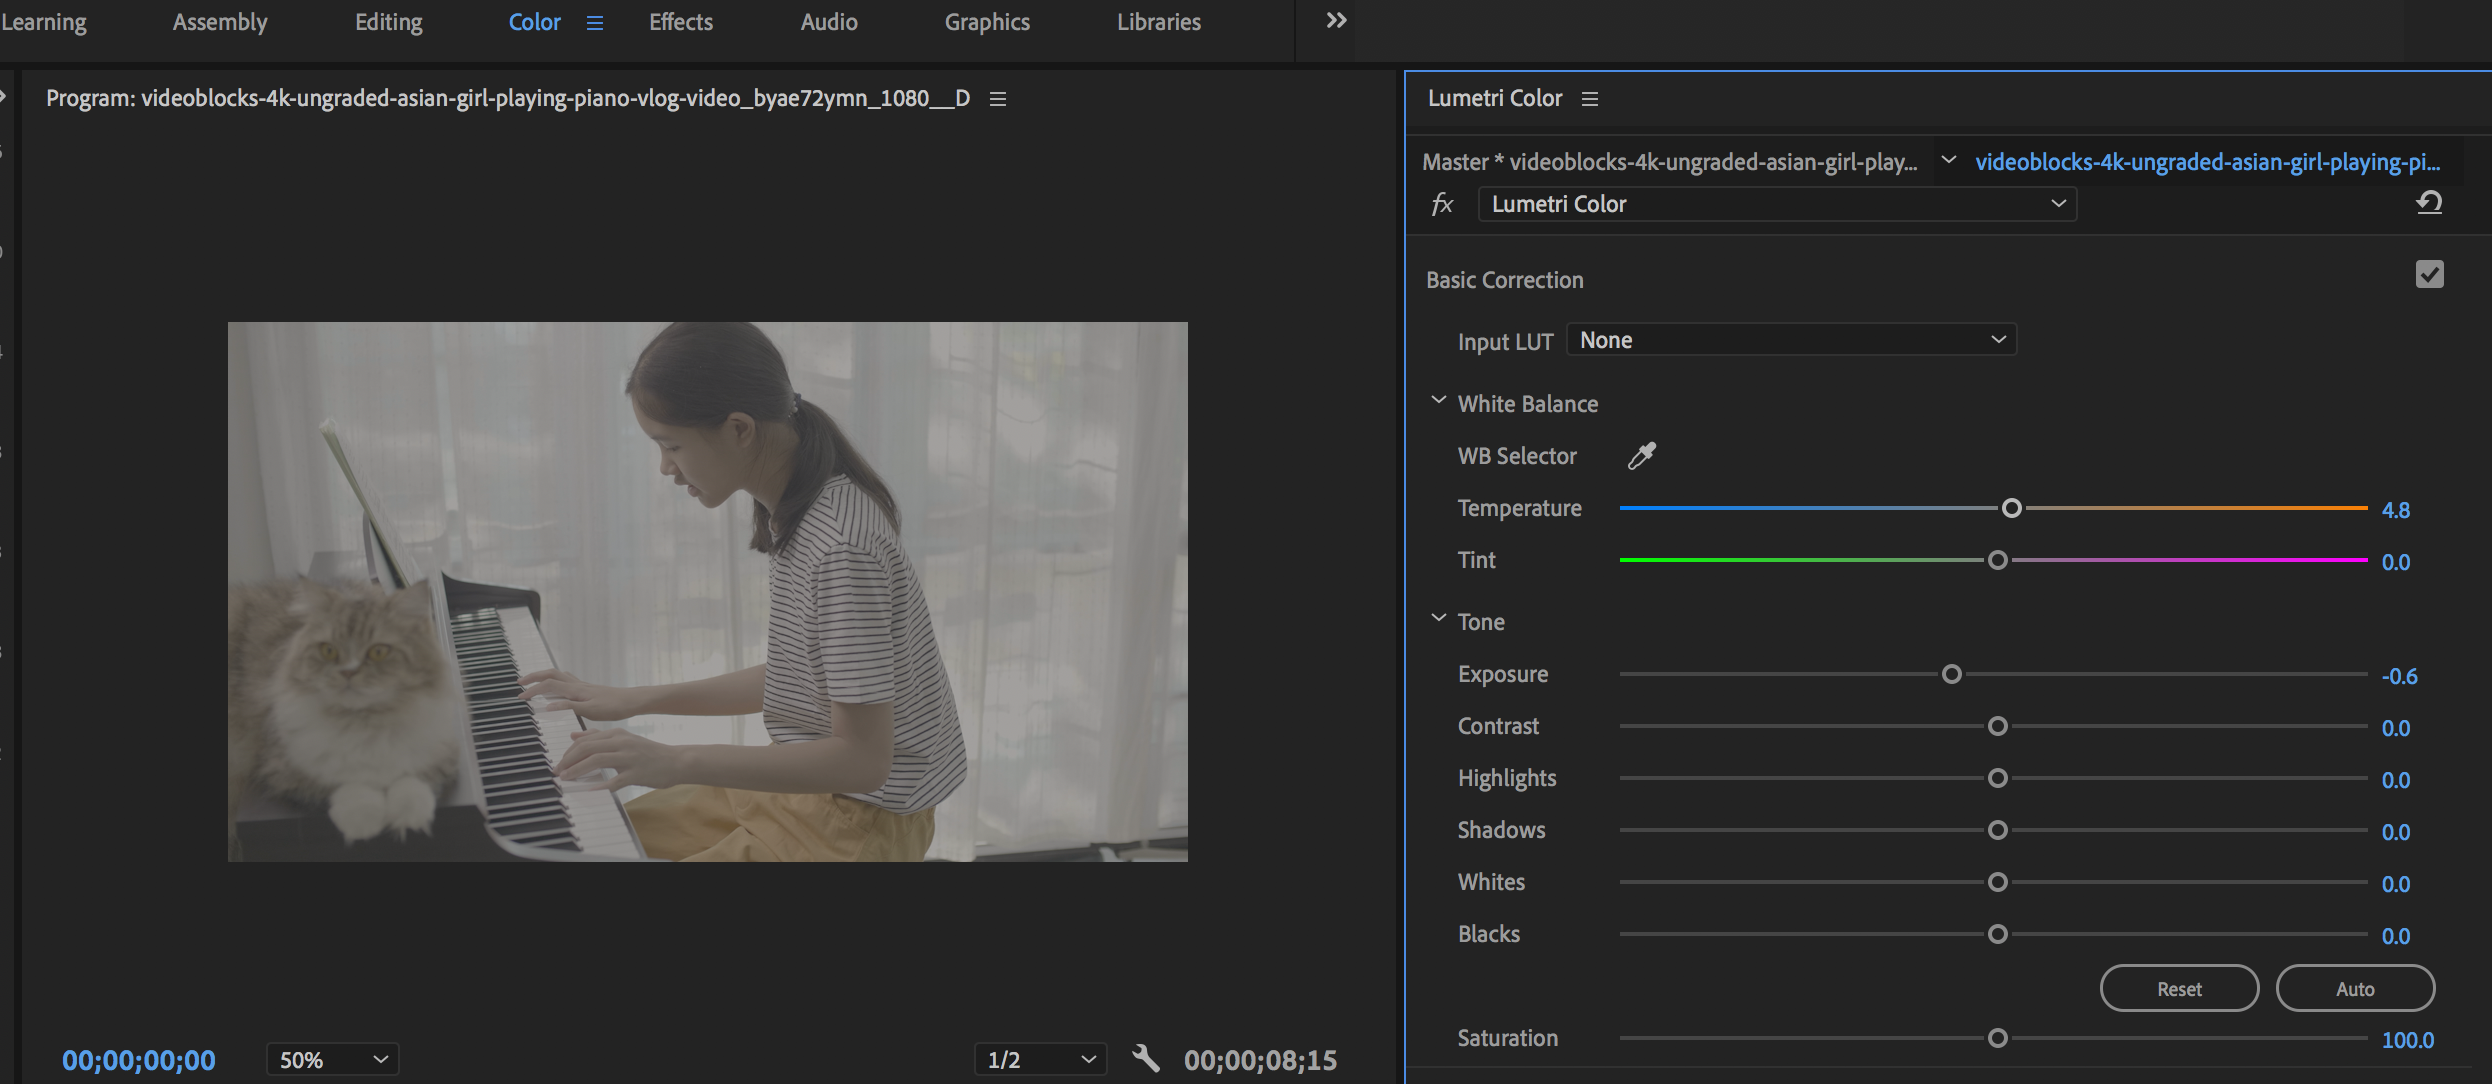
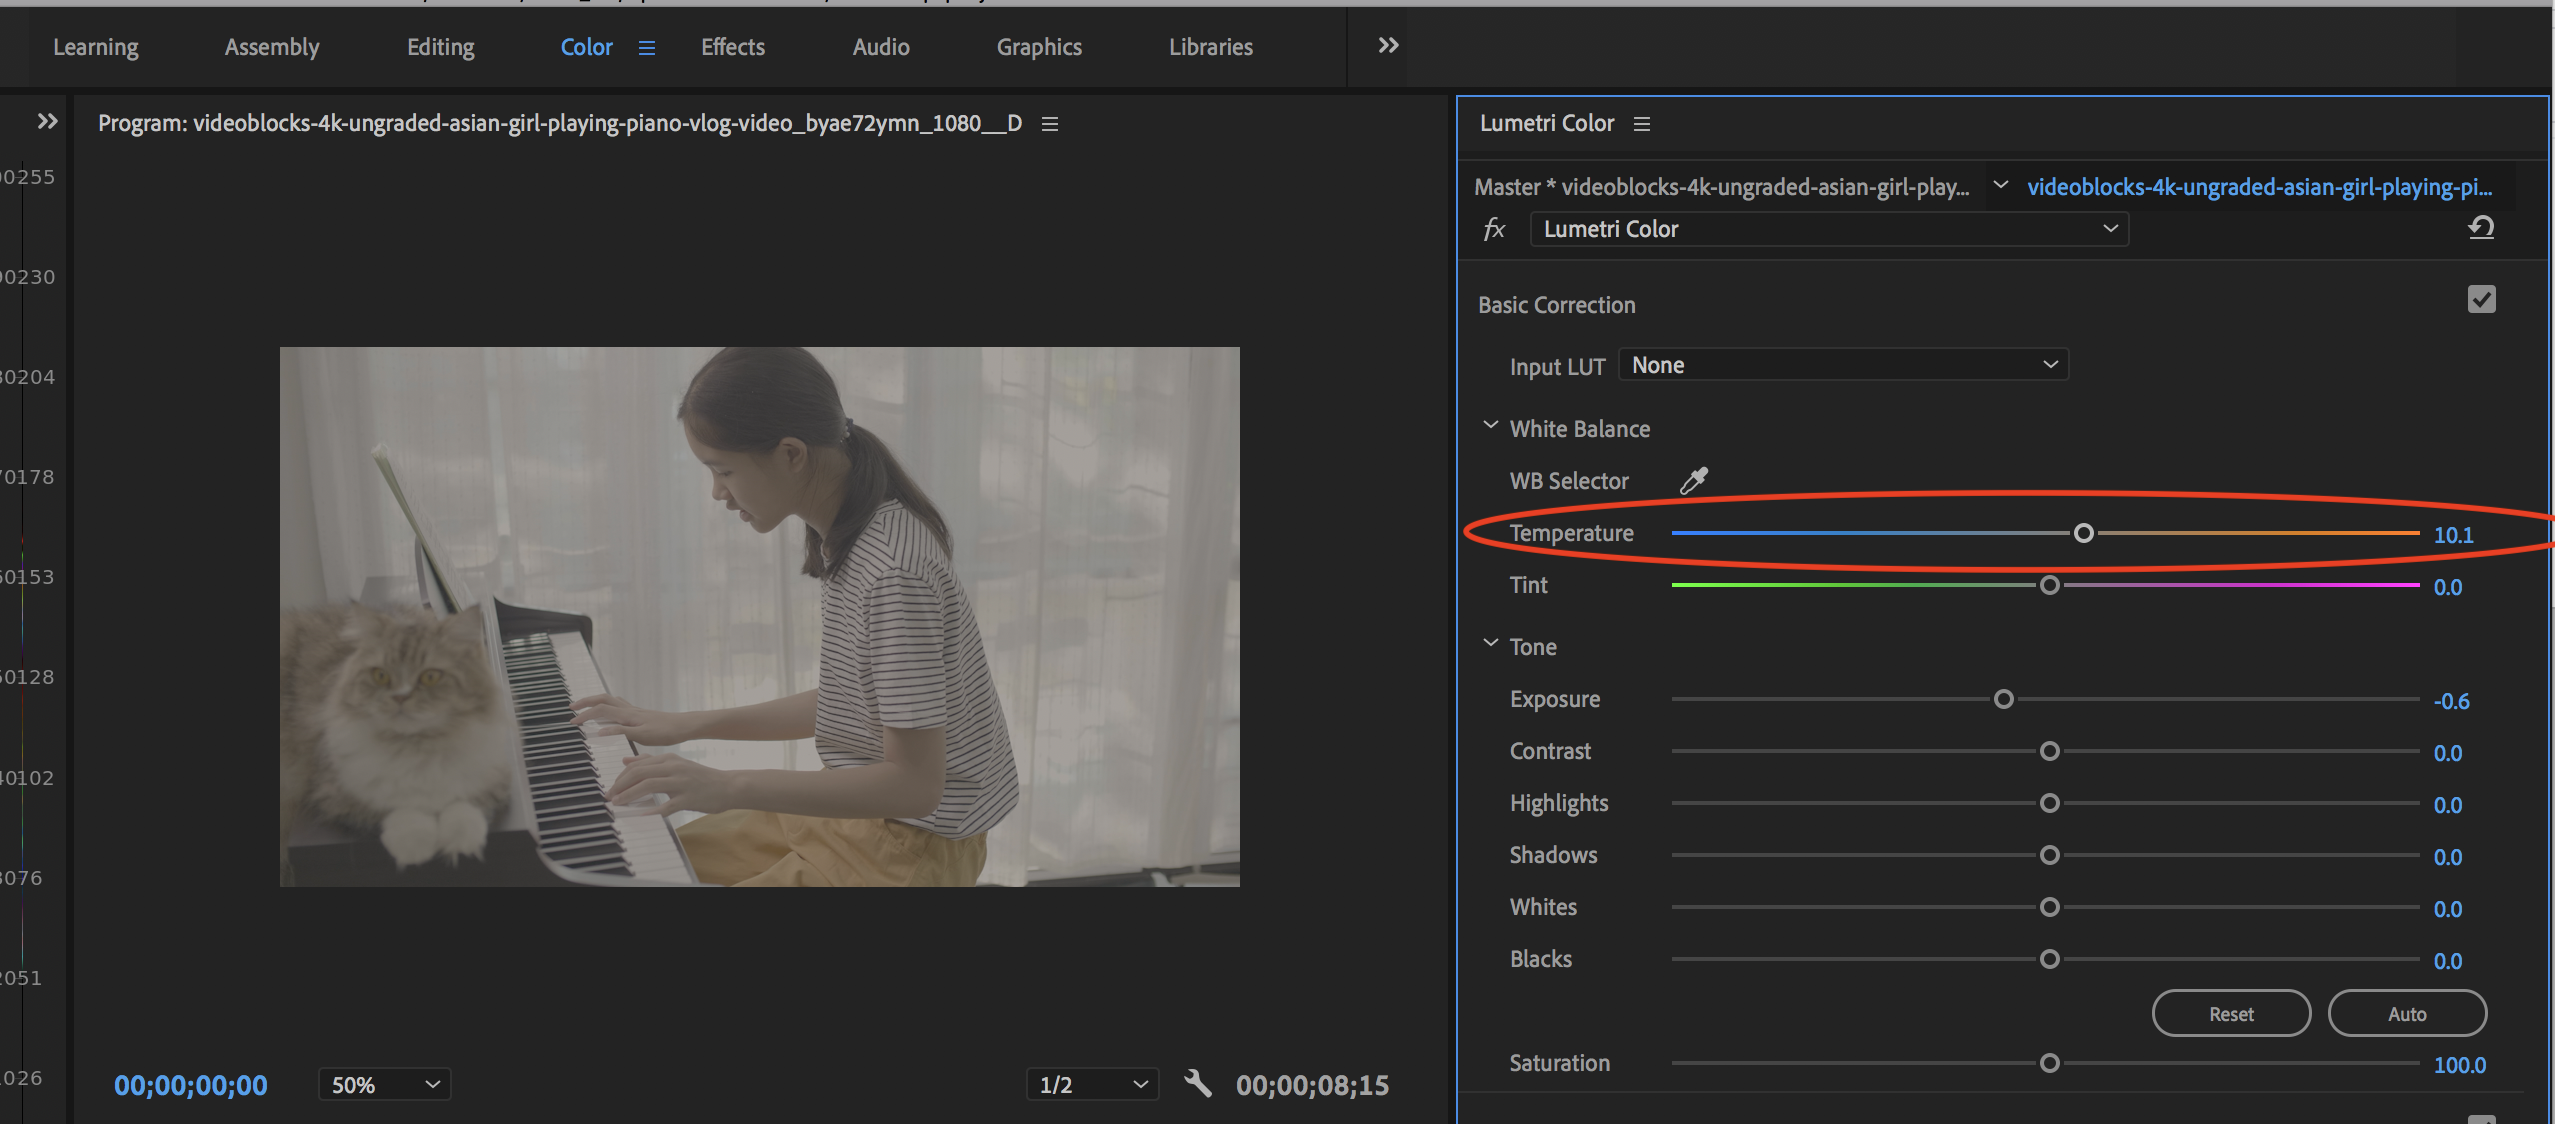
You can also use the Temperature slider under the White Balance section to correct white balance. Adjust the Temperature slider to a warmer tone (the orange side)or a cooler tone ( the blue side) until the areas in your footage that are supposed to be white change to pure white.
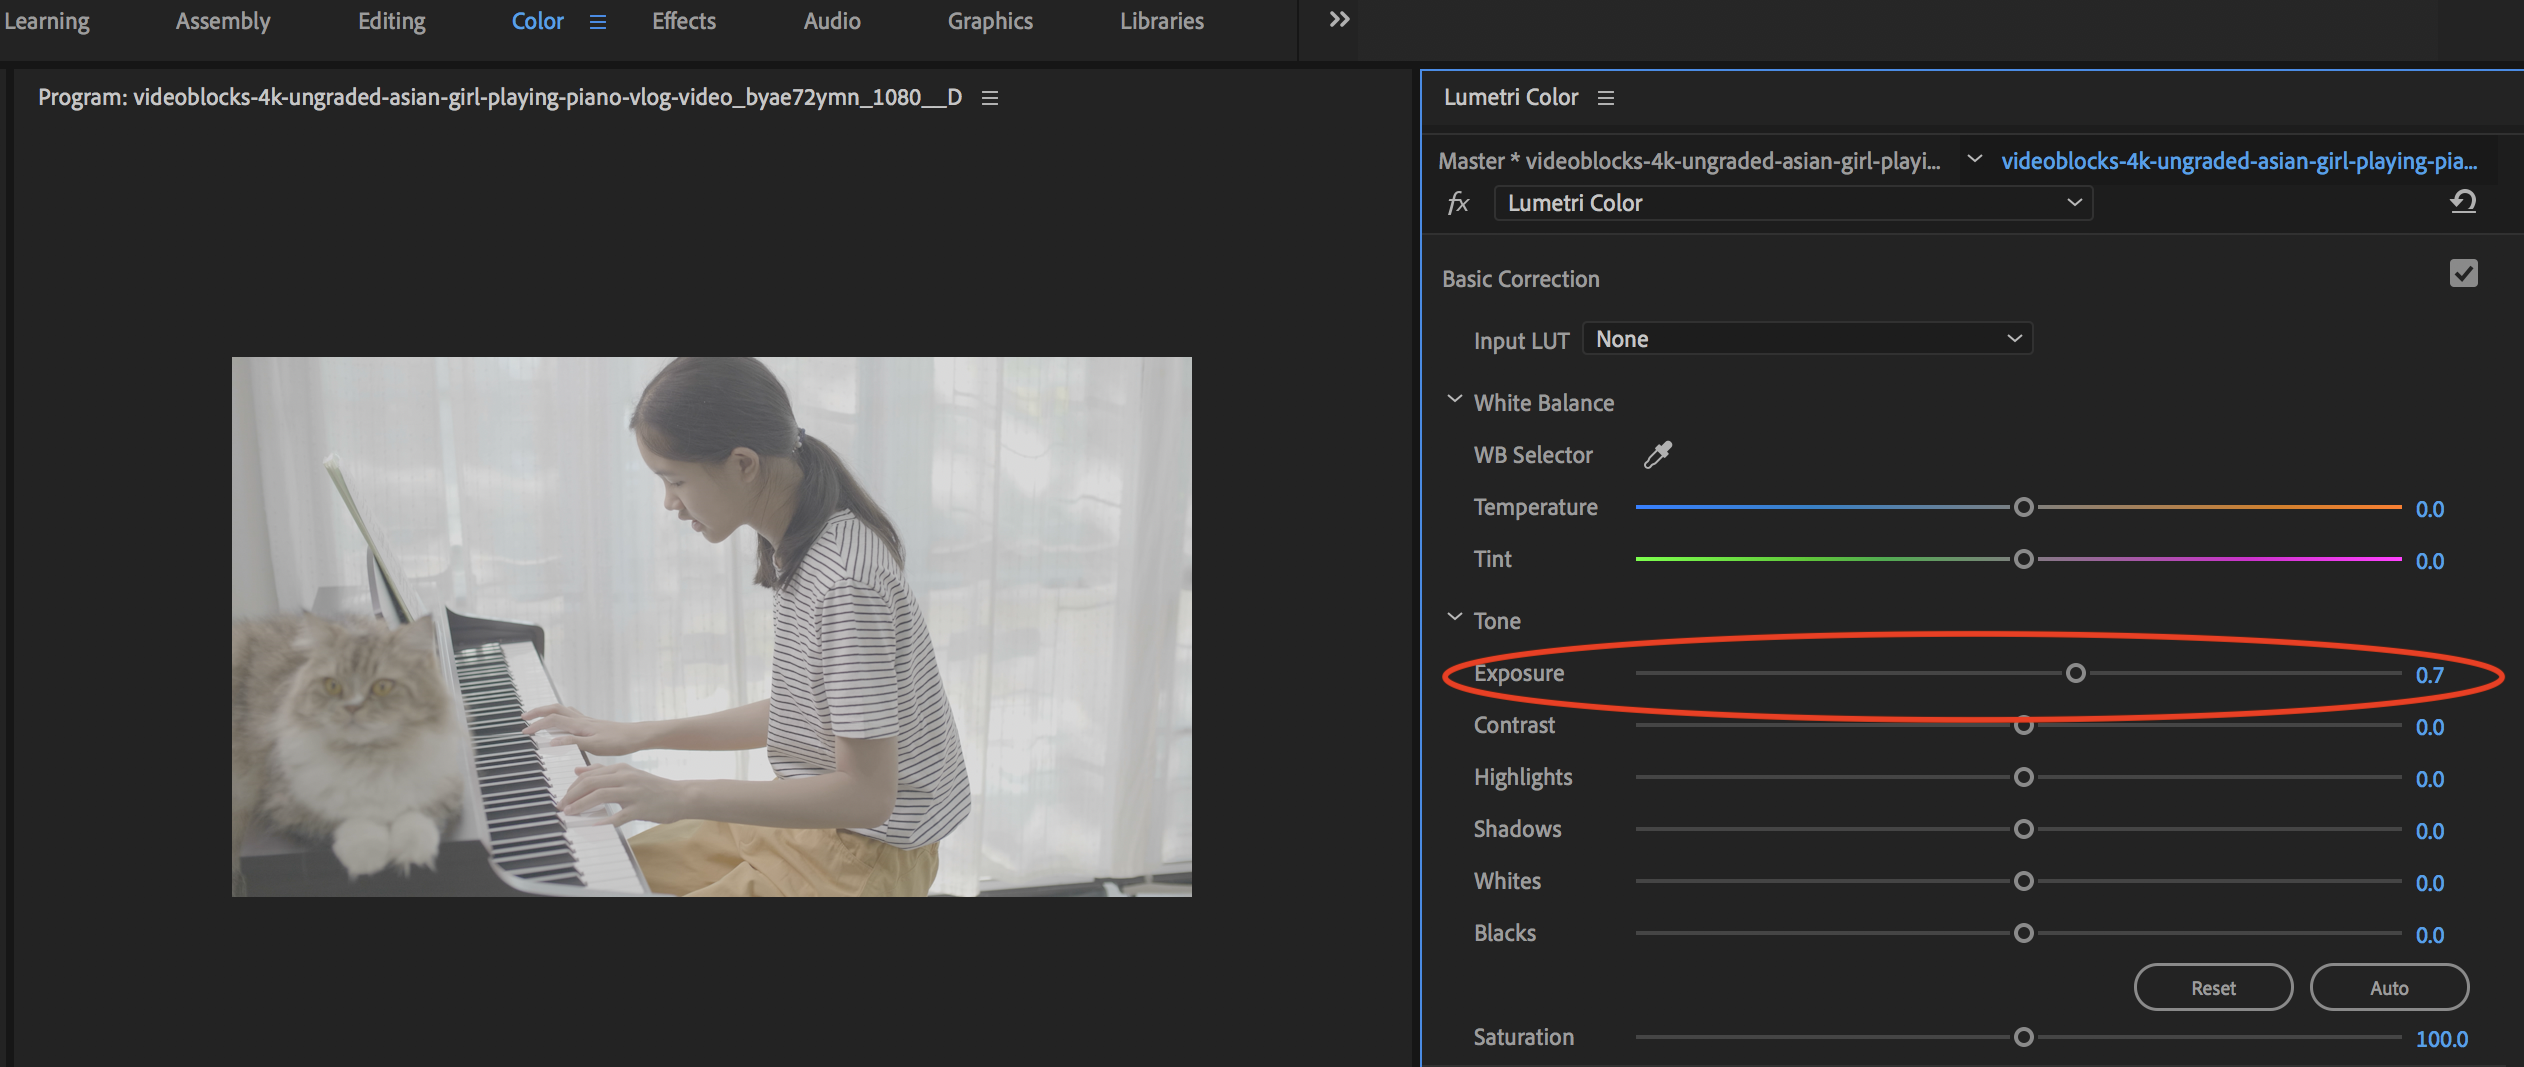
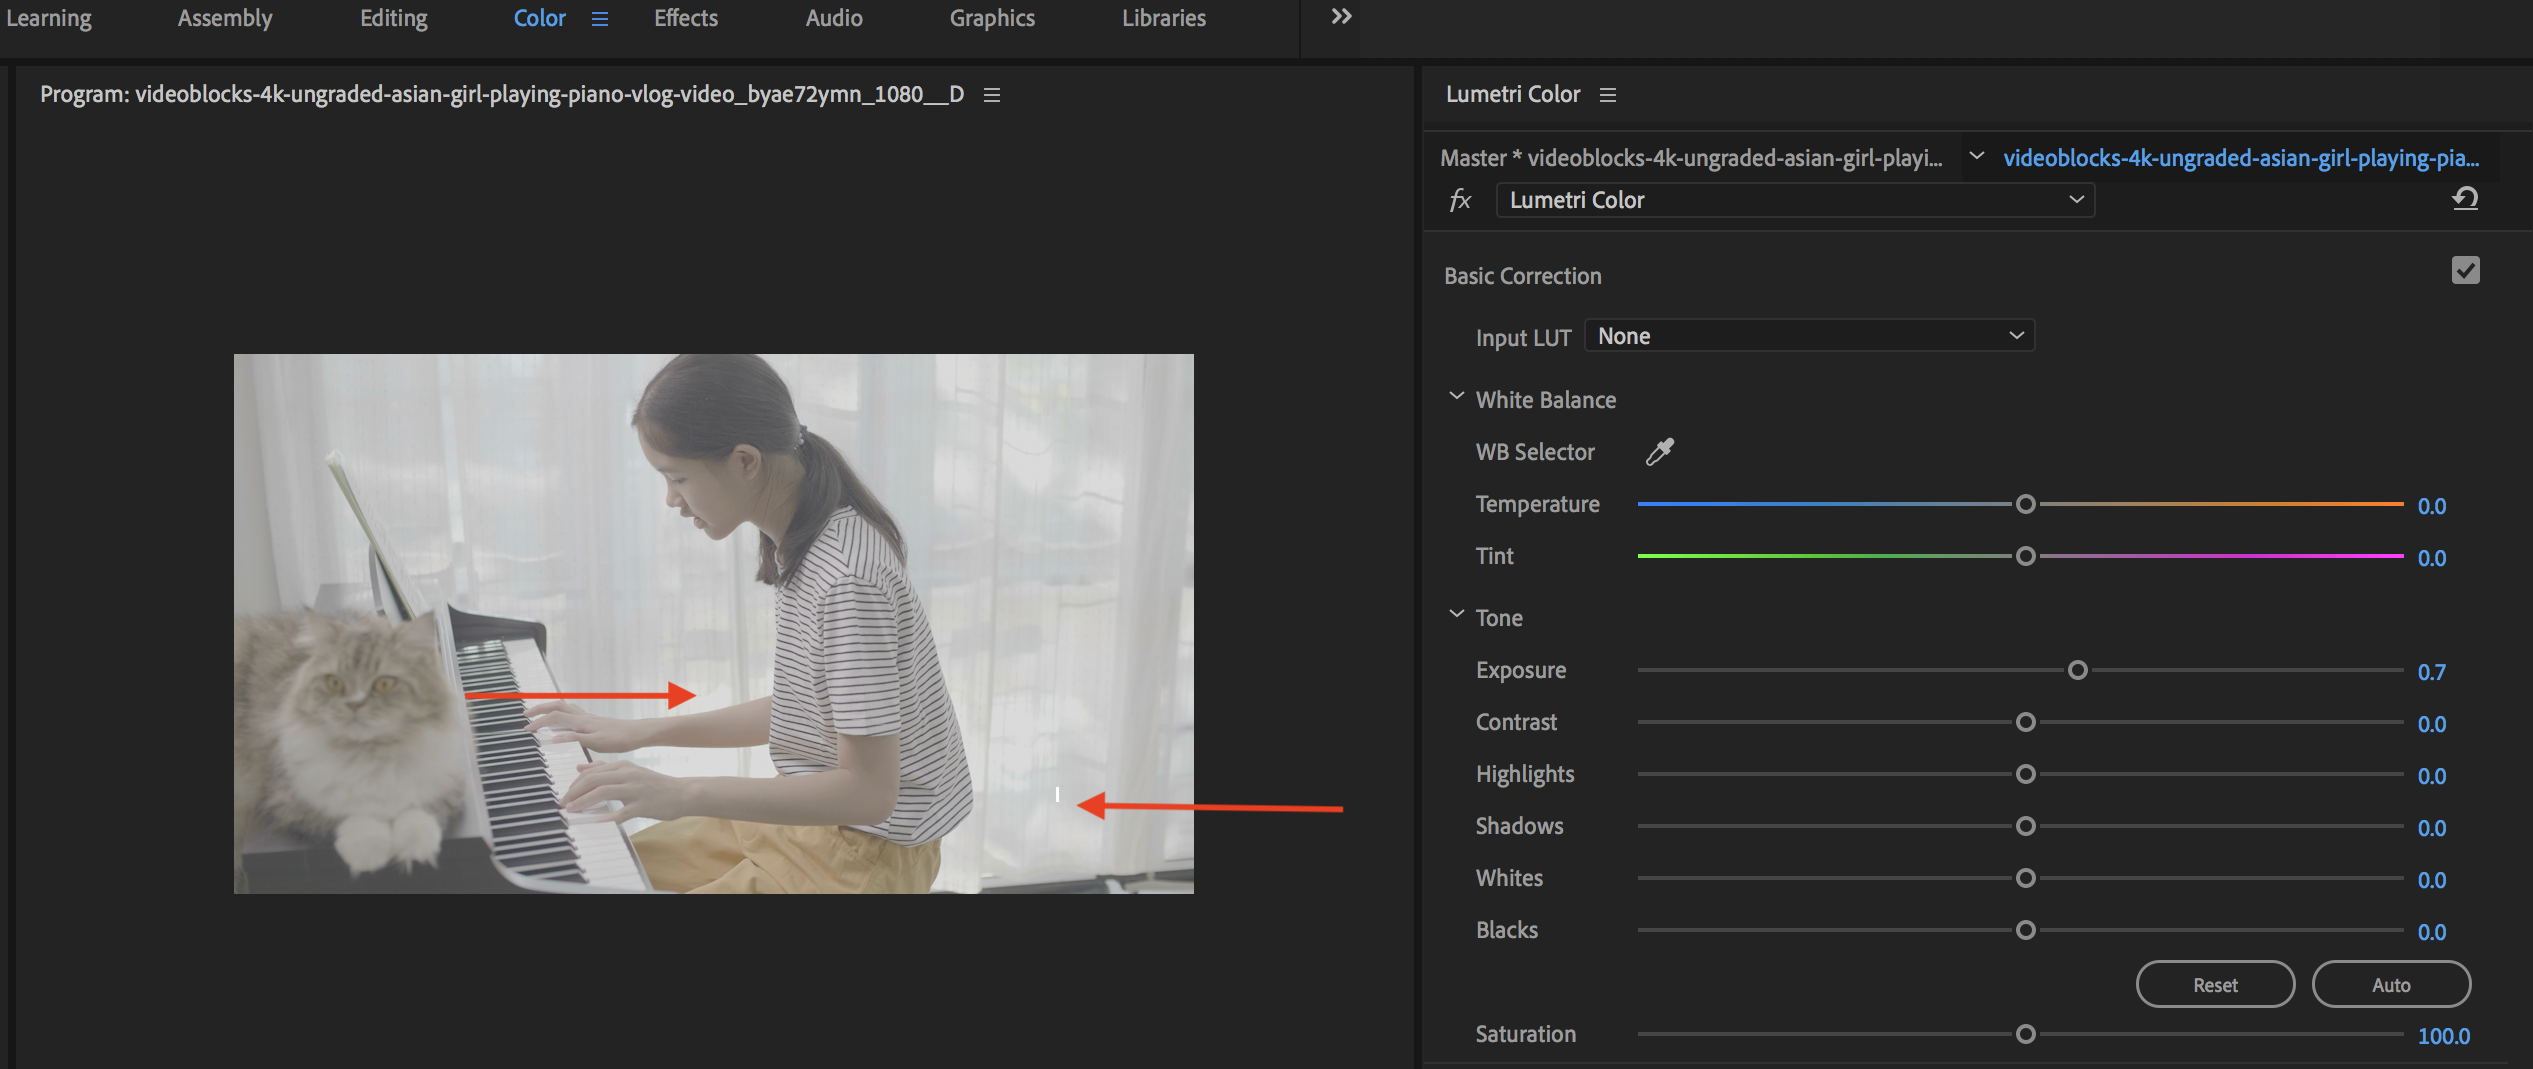
STEP 5: Now that the image is balanced, let's adjust the Exposure to increase or decrease the footage's overall brightness. Since this clip was underexposed, we'll increase the Exposure to 0.7
Now that the exposure is improved, the highlights or bright spots in the footage are slightly blown out.
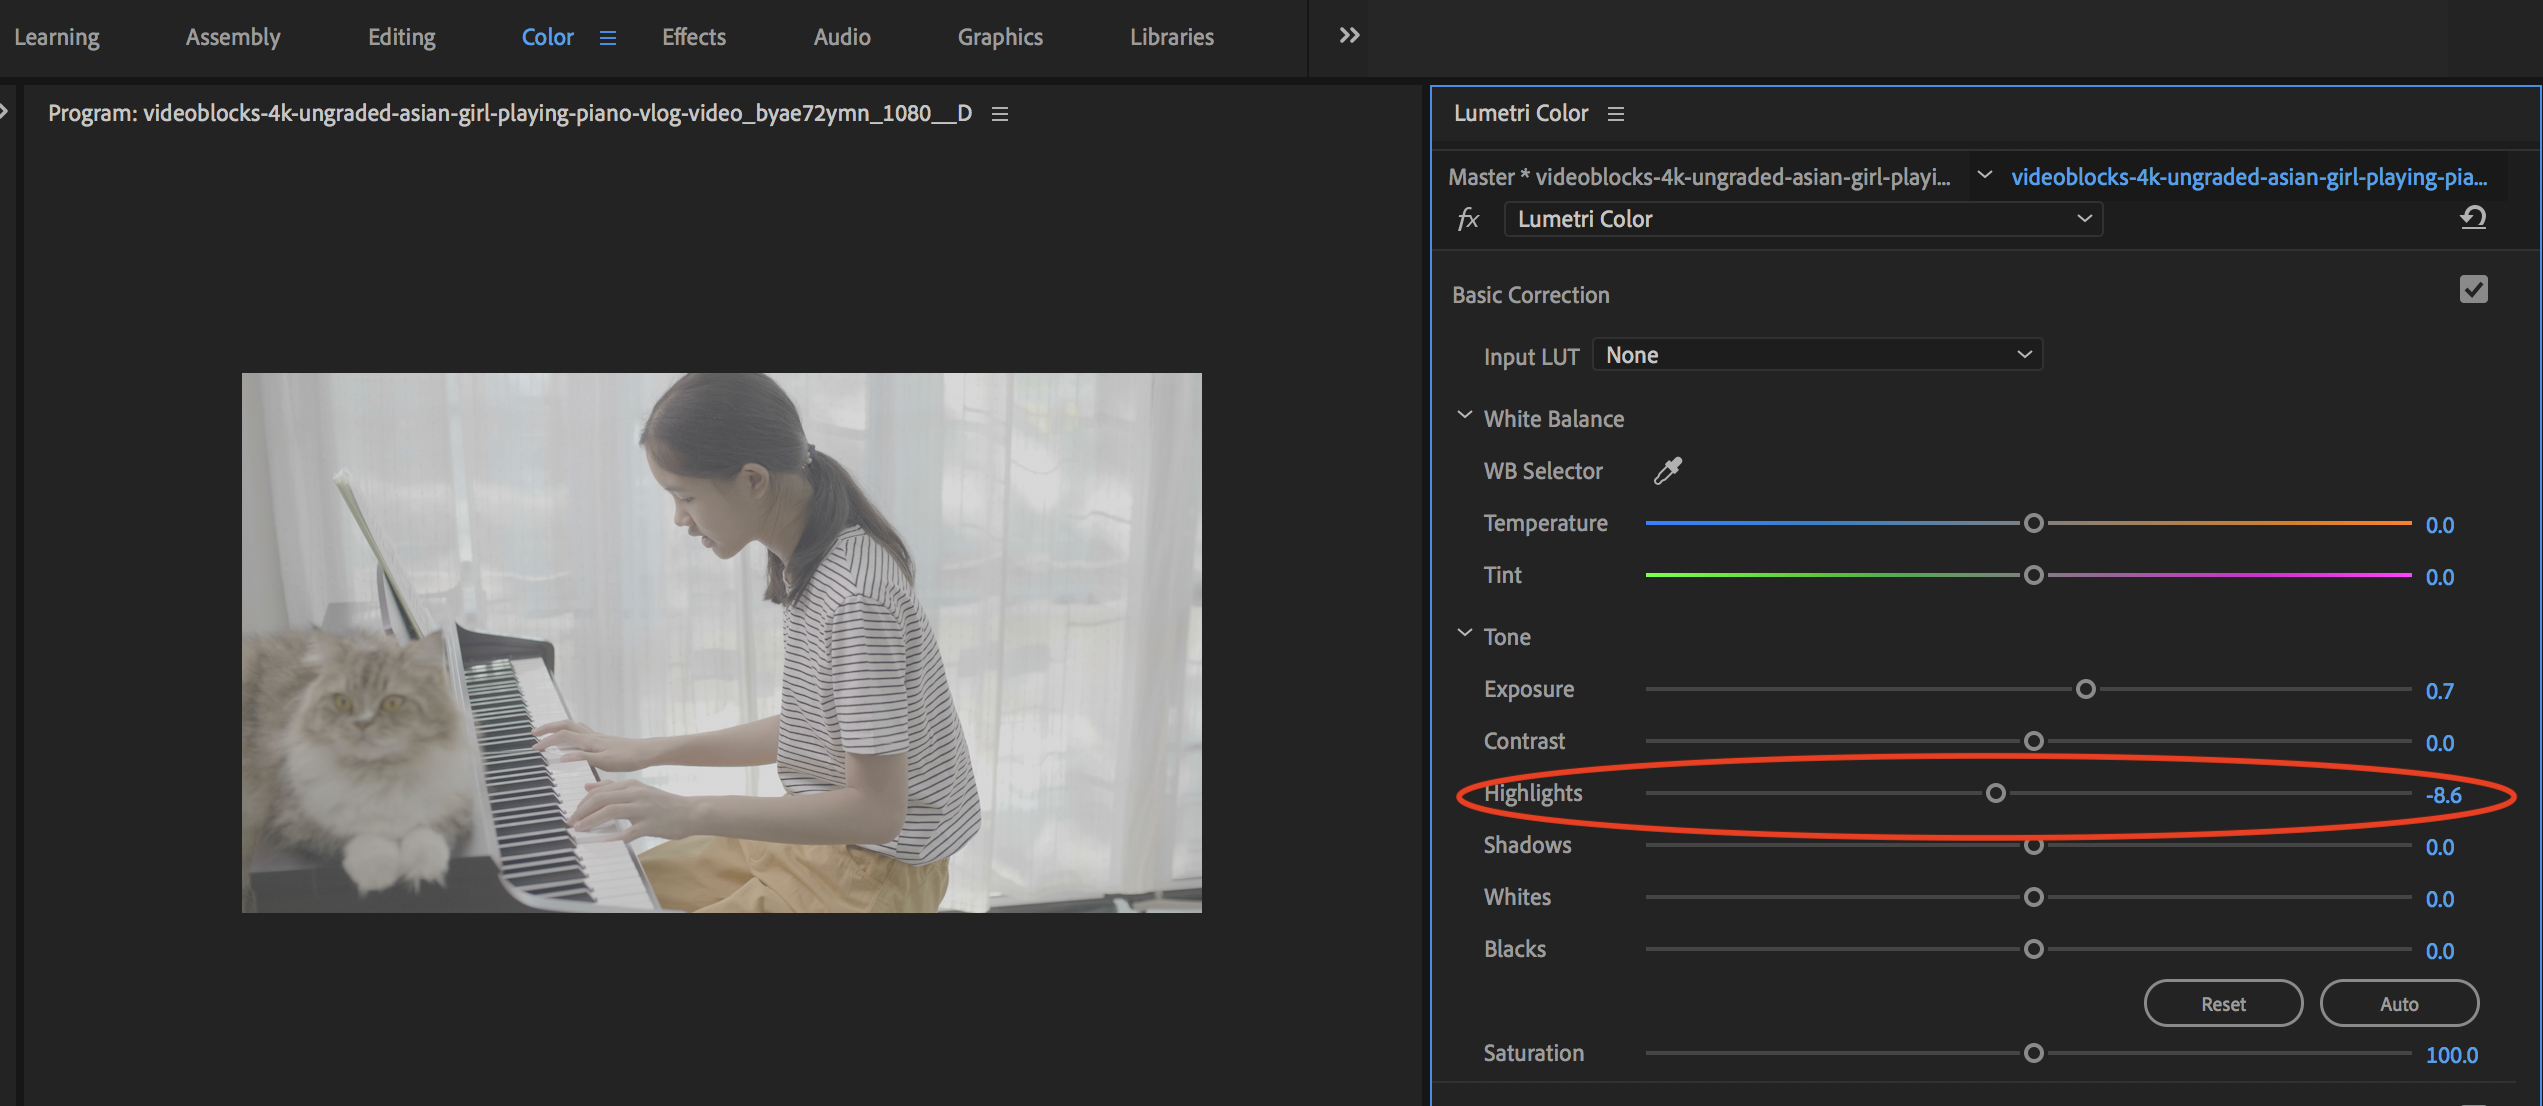
To compensate, let's take the Highlights slider down a tad bit to -8.6.
STEP 6: Using the Shadows setting, we can increase or decrease the darkest parts of the footage without affecting the lighter areas. We've raised the shadow and deepened the dark spots by adjusting the Shadows slider to around -20.
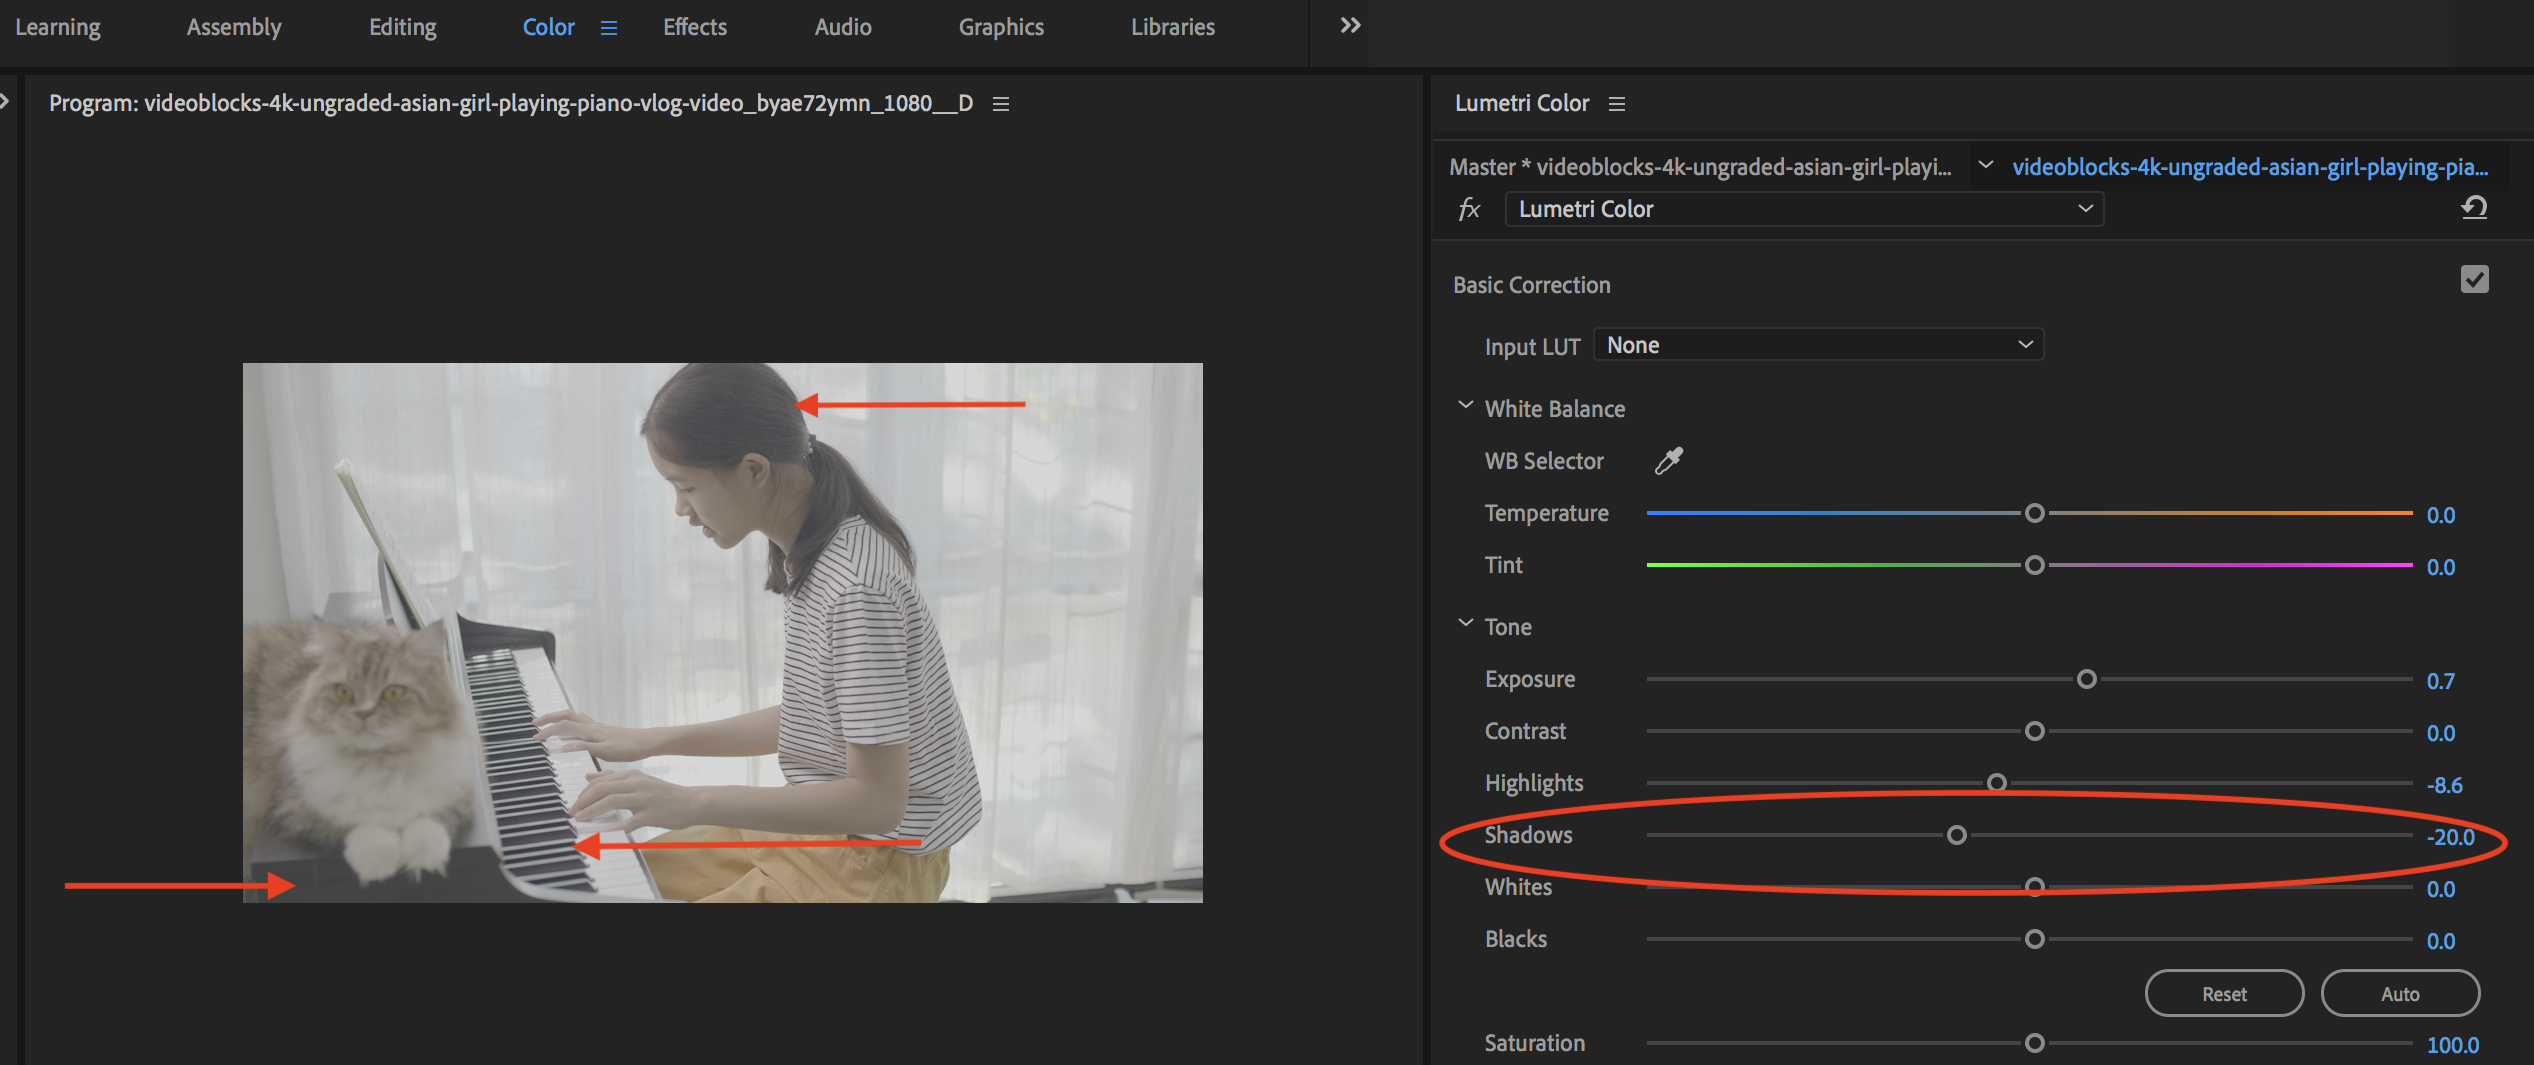
We recommended not to increase the Shadows slider above the 30 or 40 parameters. If you do, it introduces video noise and grain to the footage.
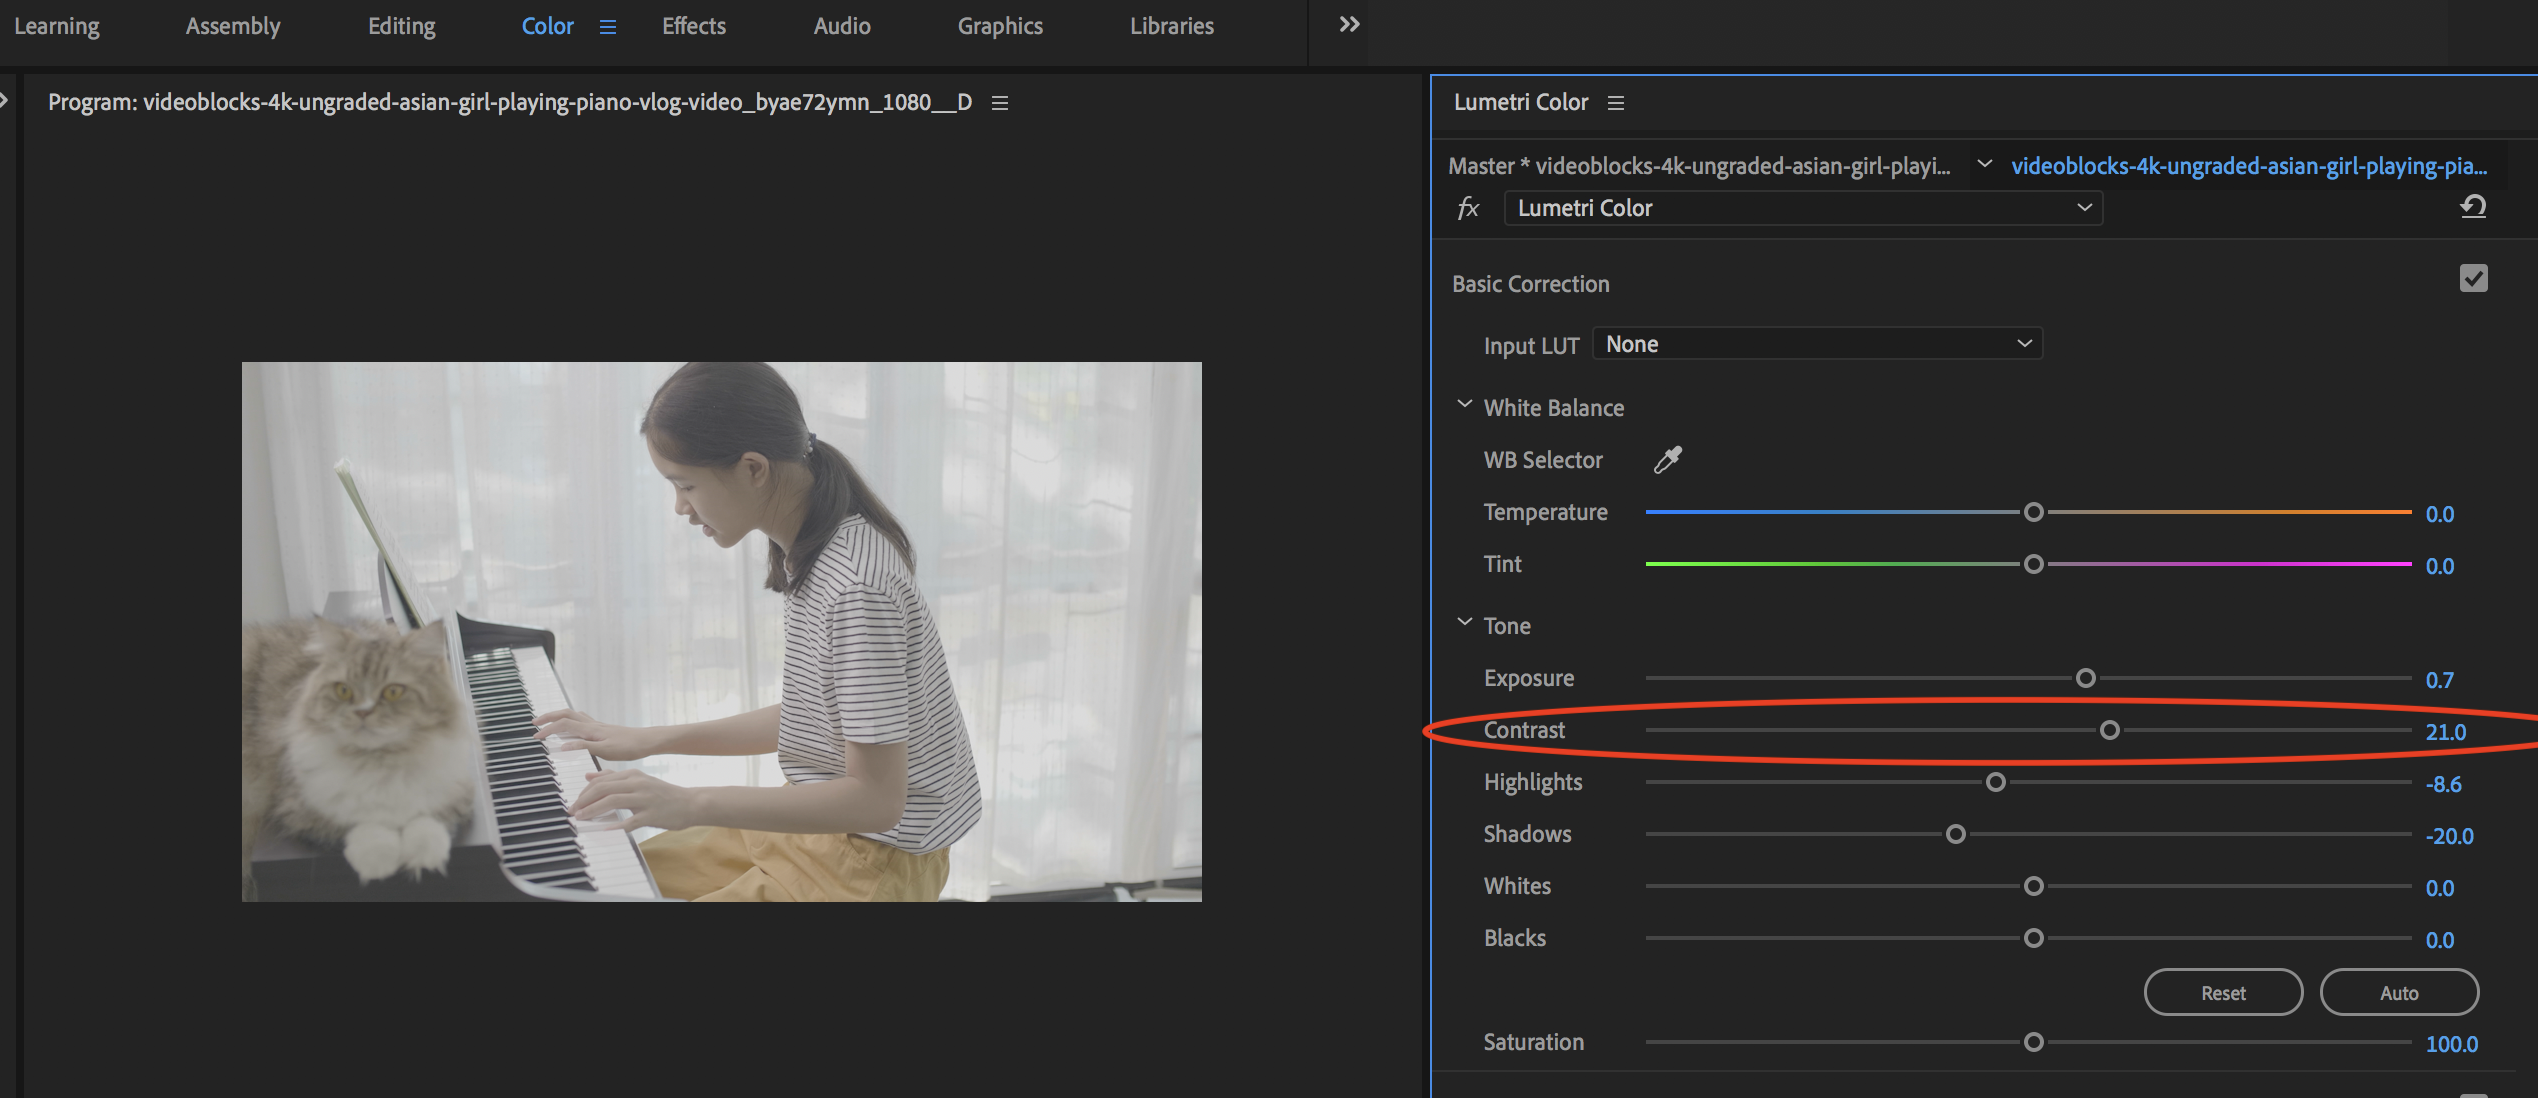
STEP 7: Now, we'll move on to the Contrast slider. Decreasing the contrast will wash out the footage, making the darker areas much lighter.
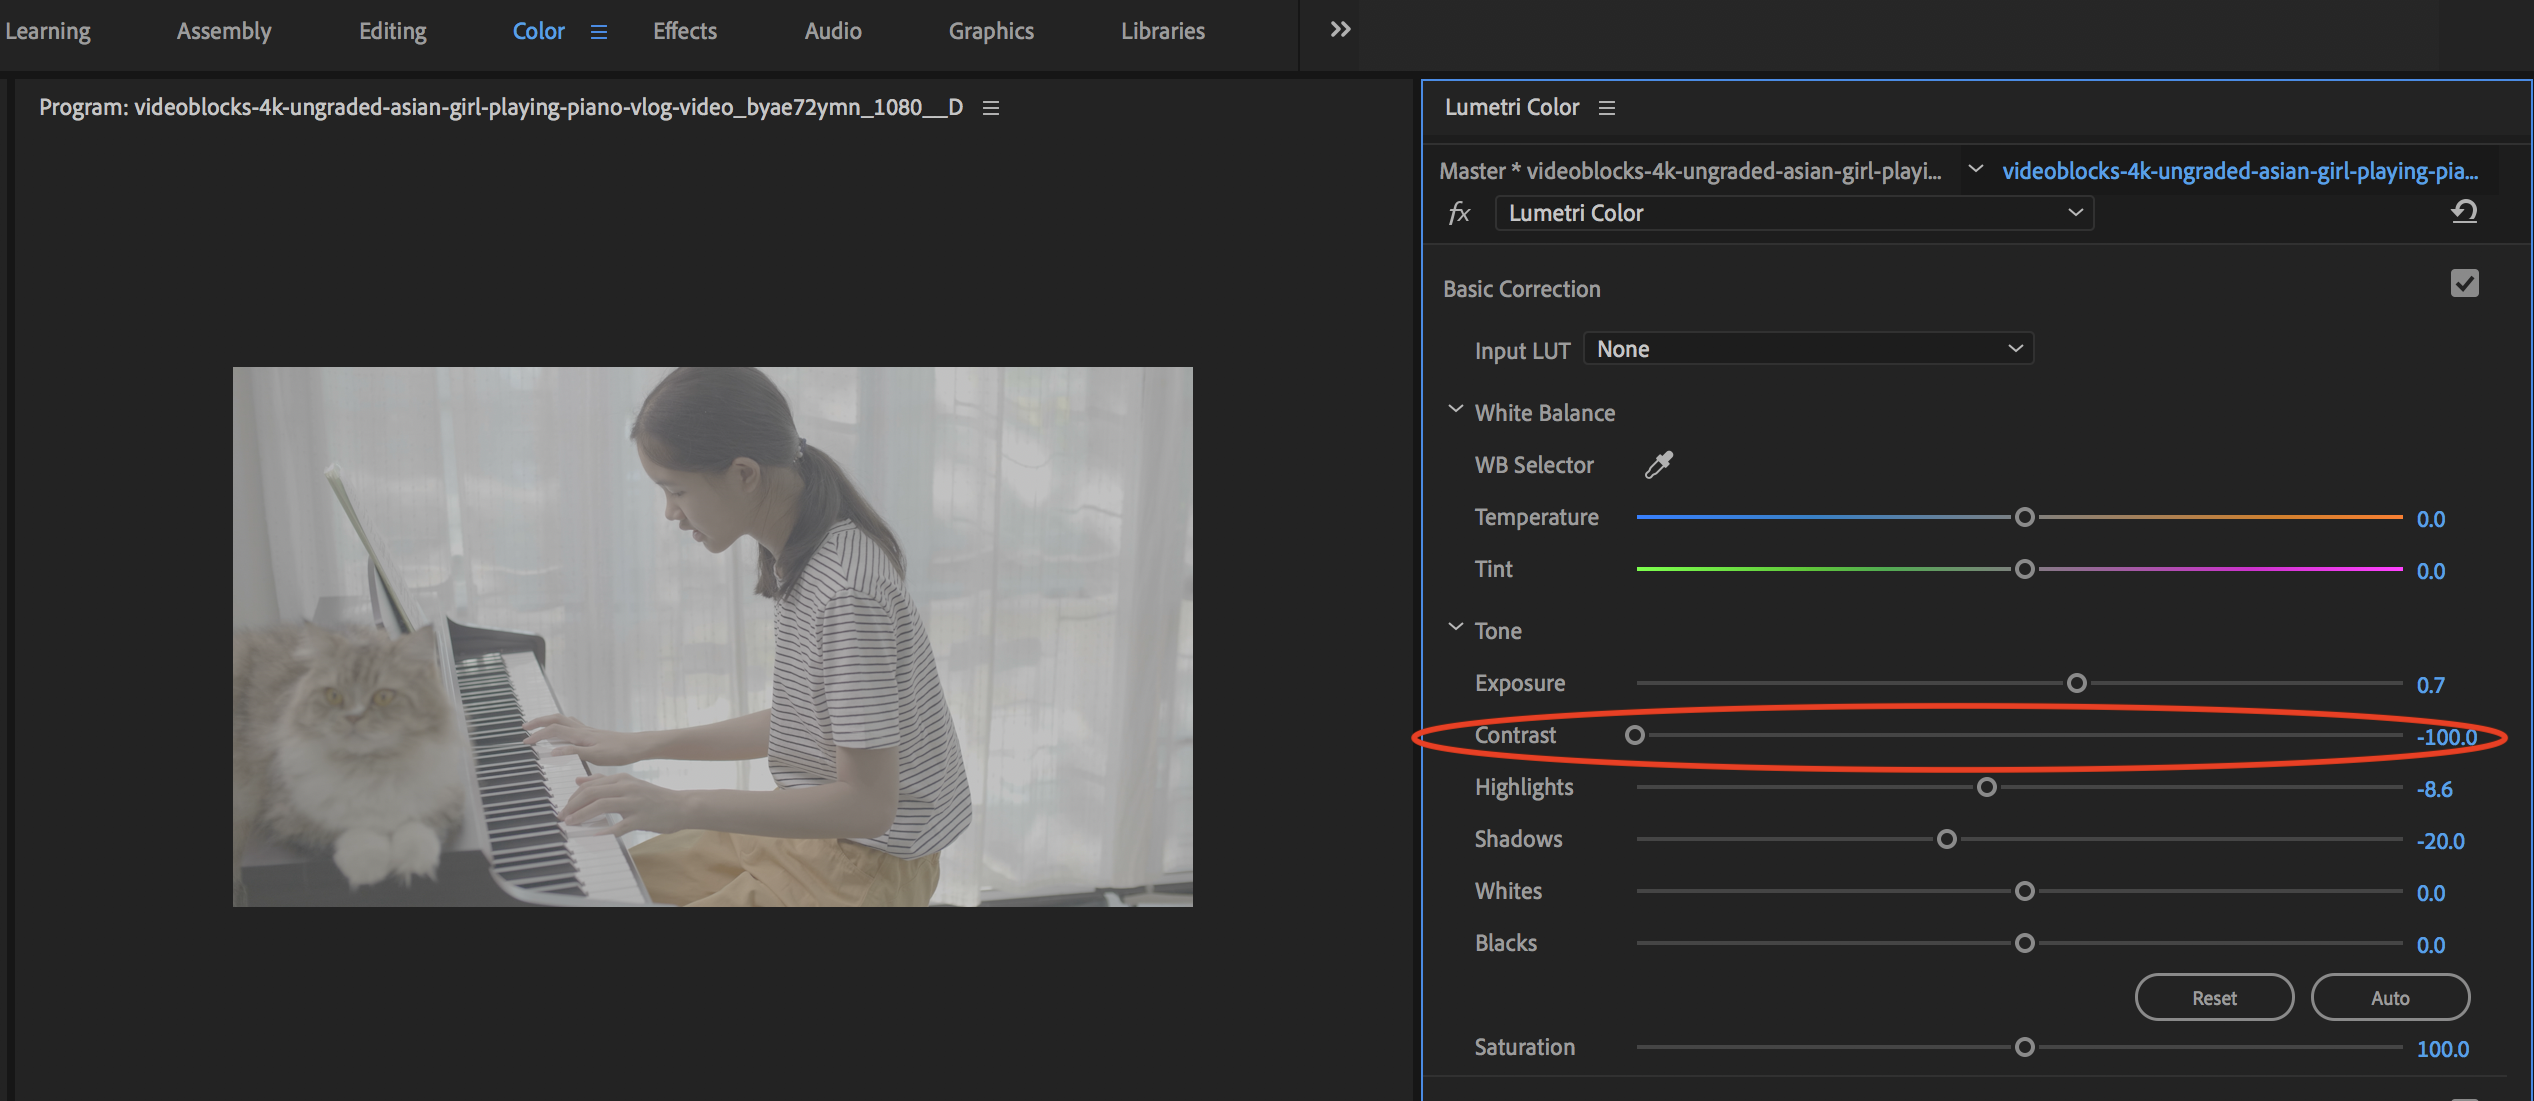
Increasing the contrast will darken the overall image.
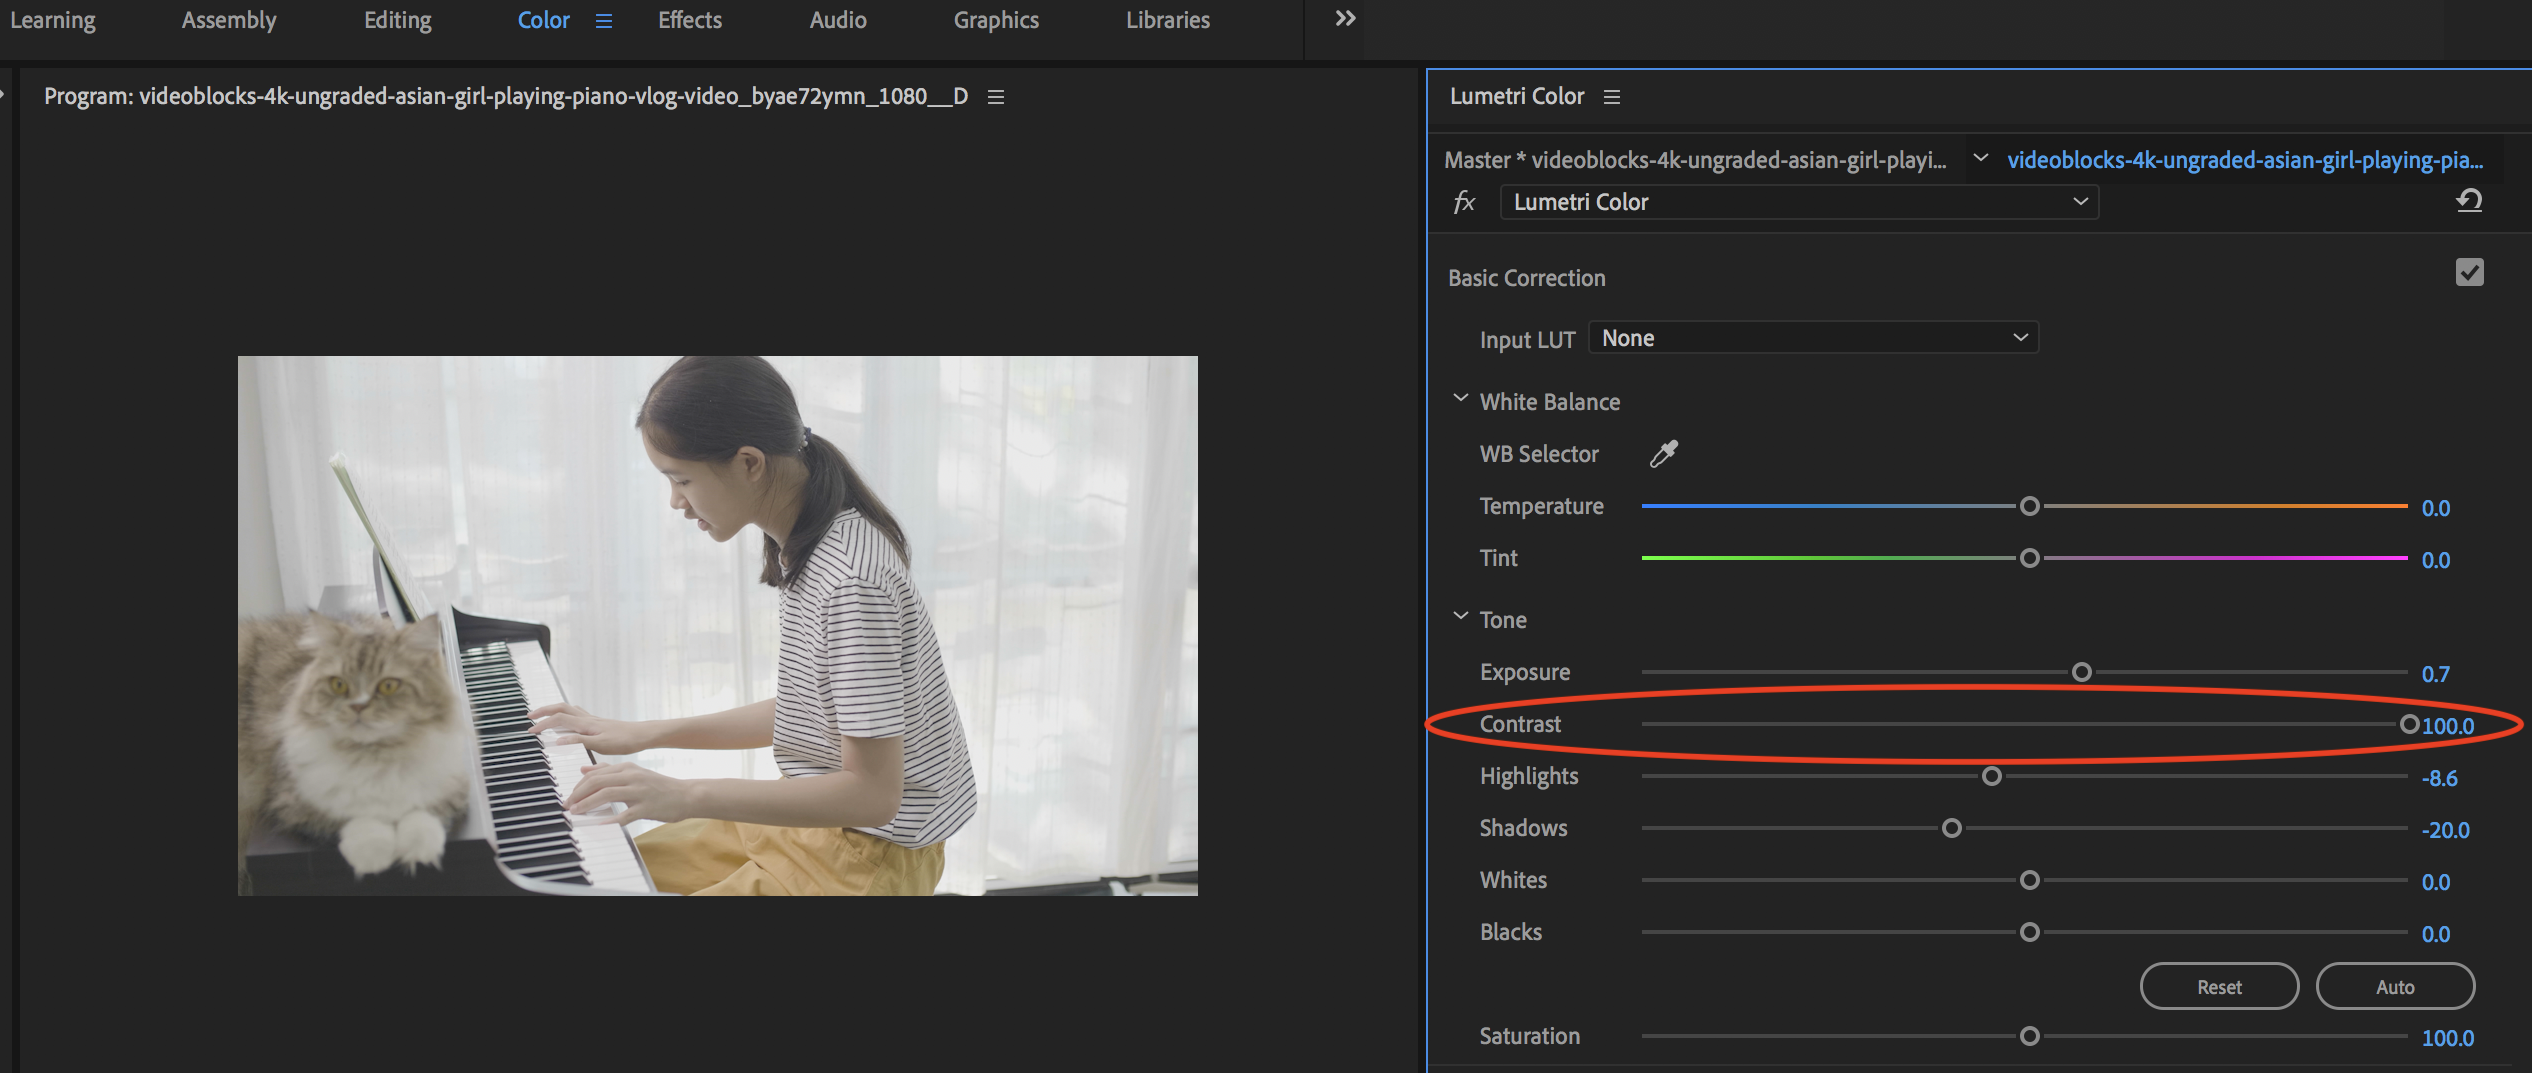
For this clip, adjust the contrast to 21.
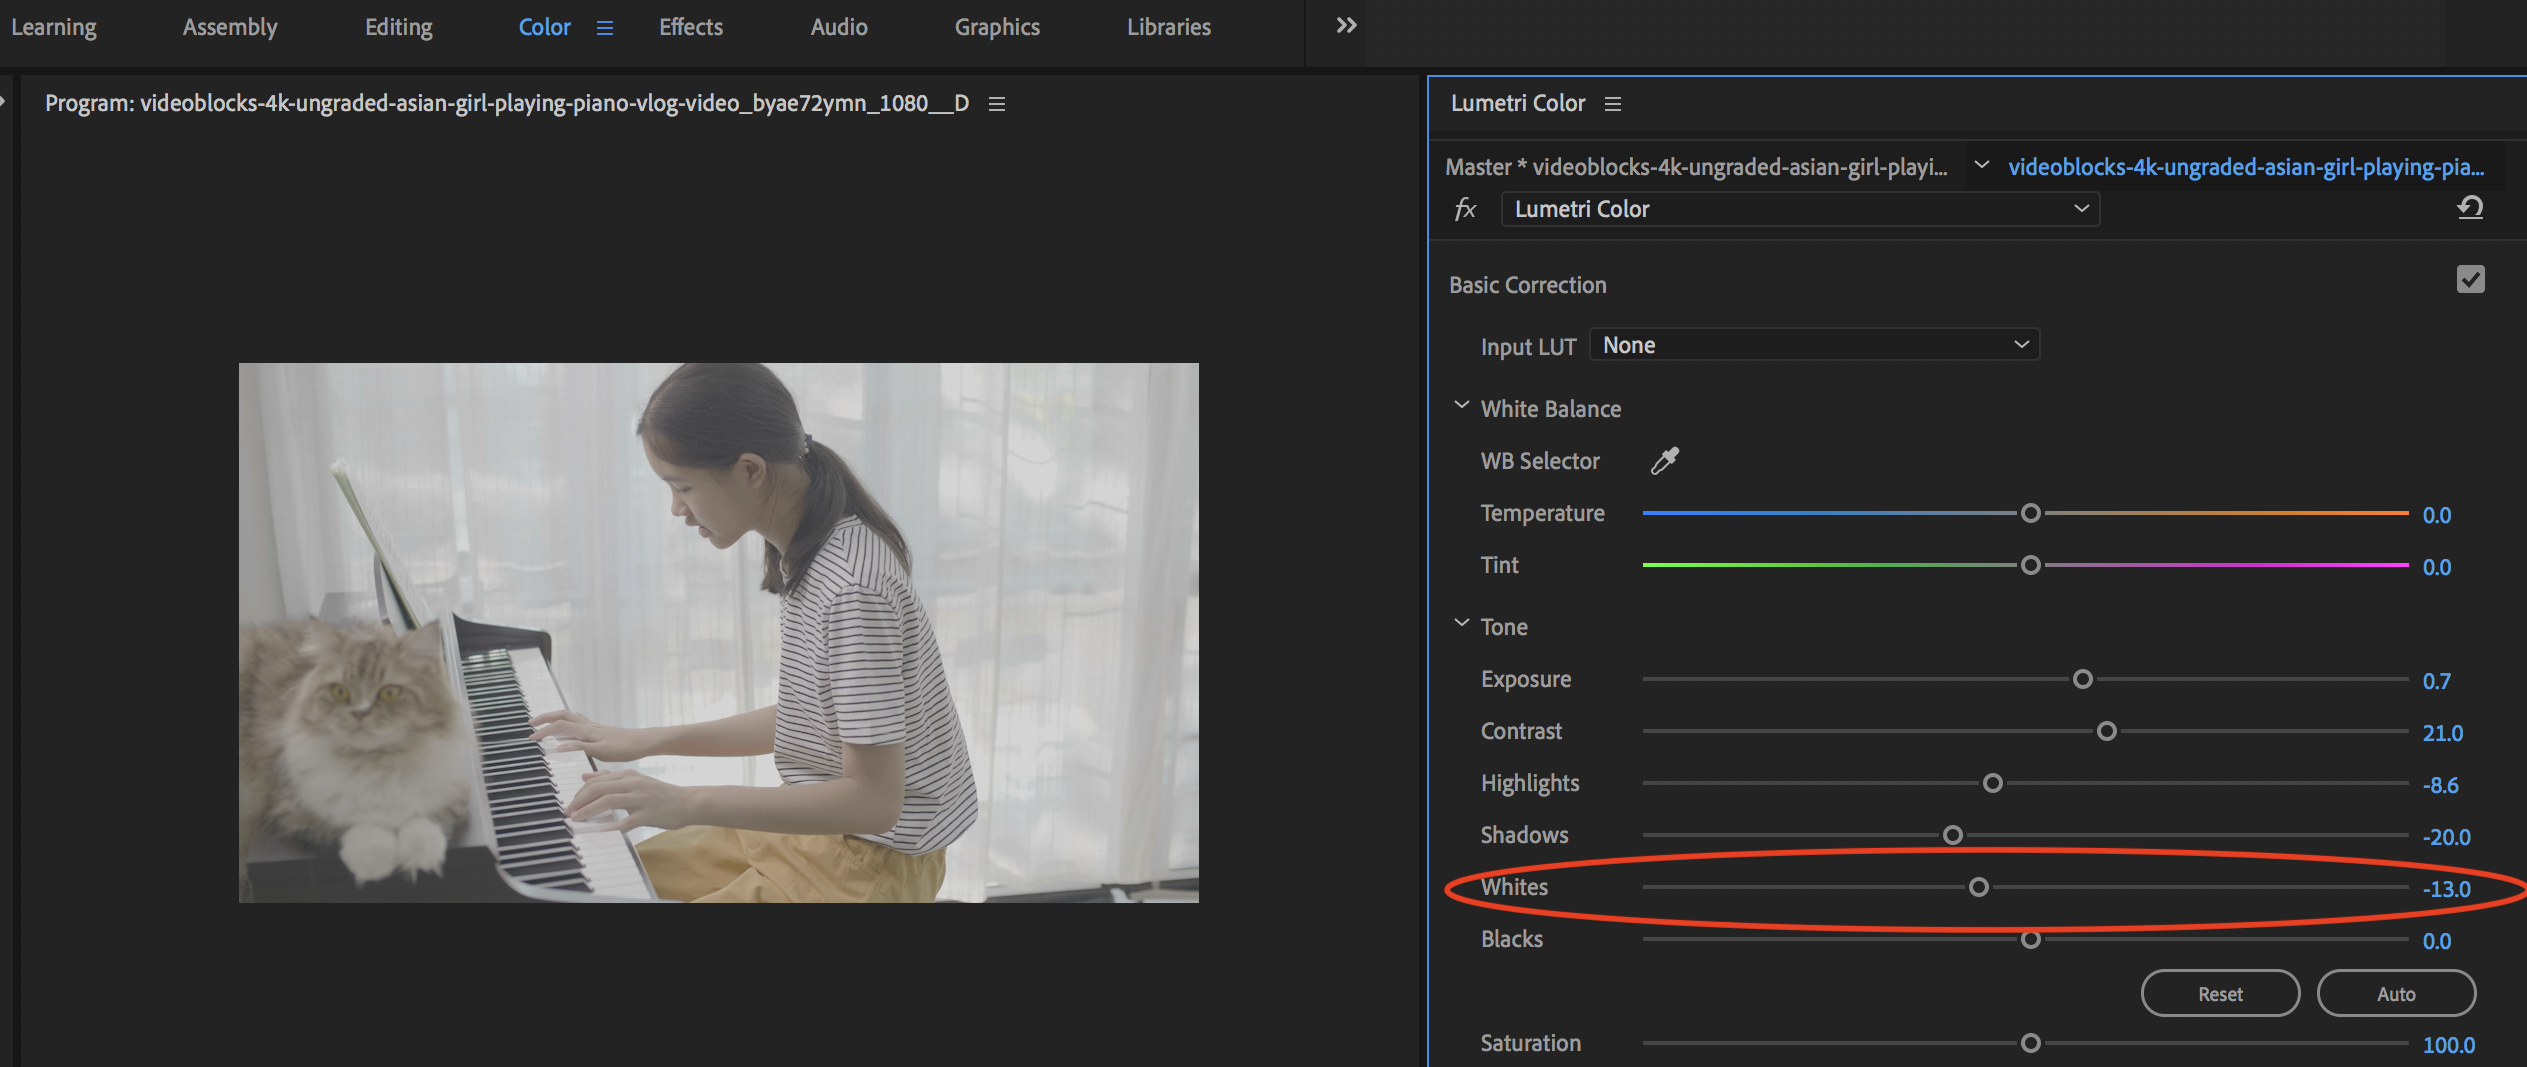
STEP 8: To help maintain the detail in the curtains in the background, decrease the Whites slider to -13.
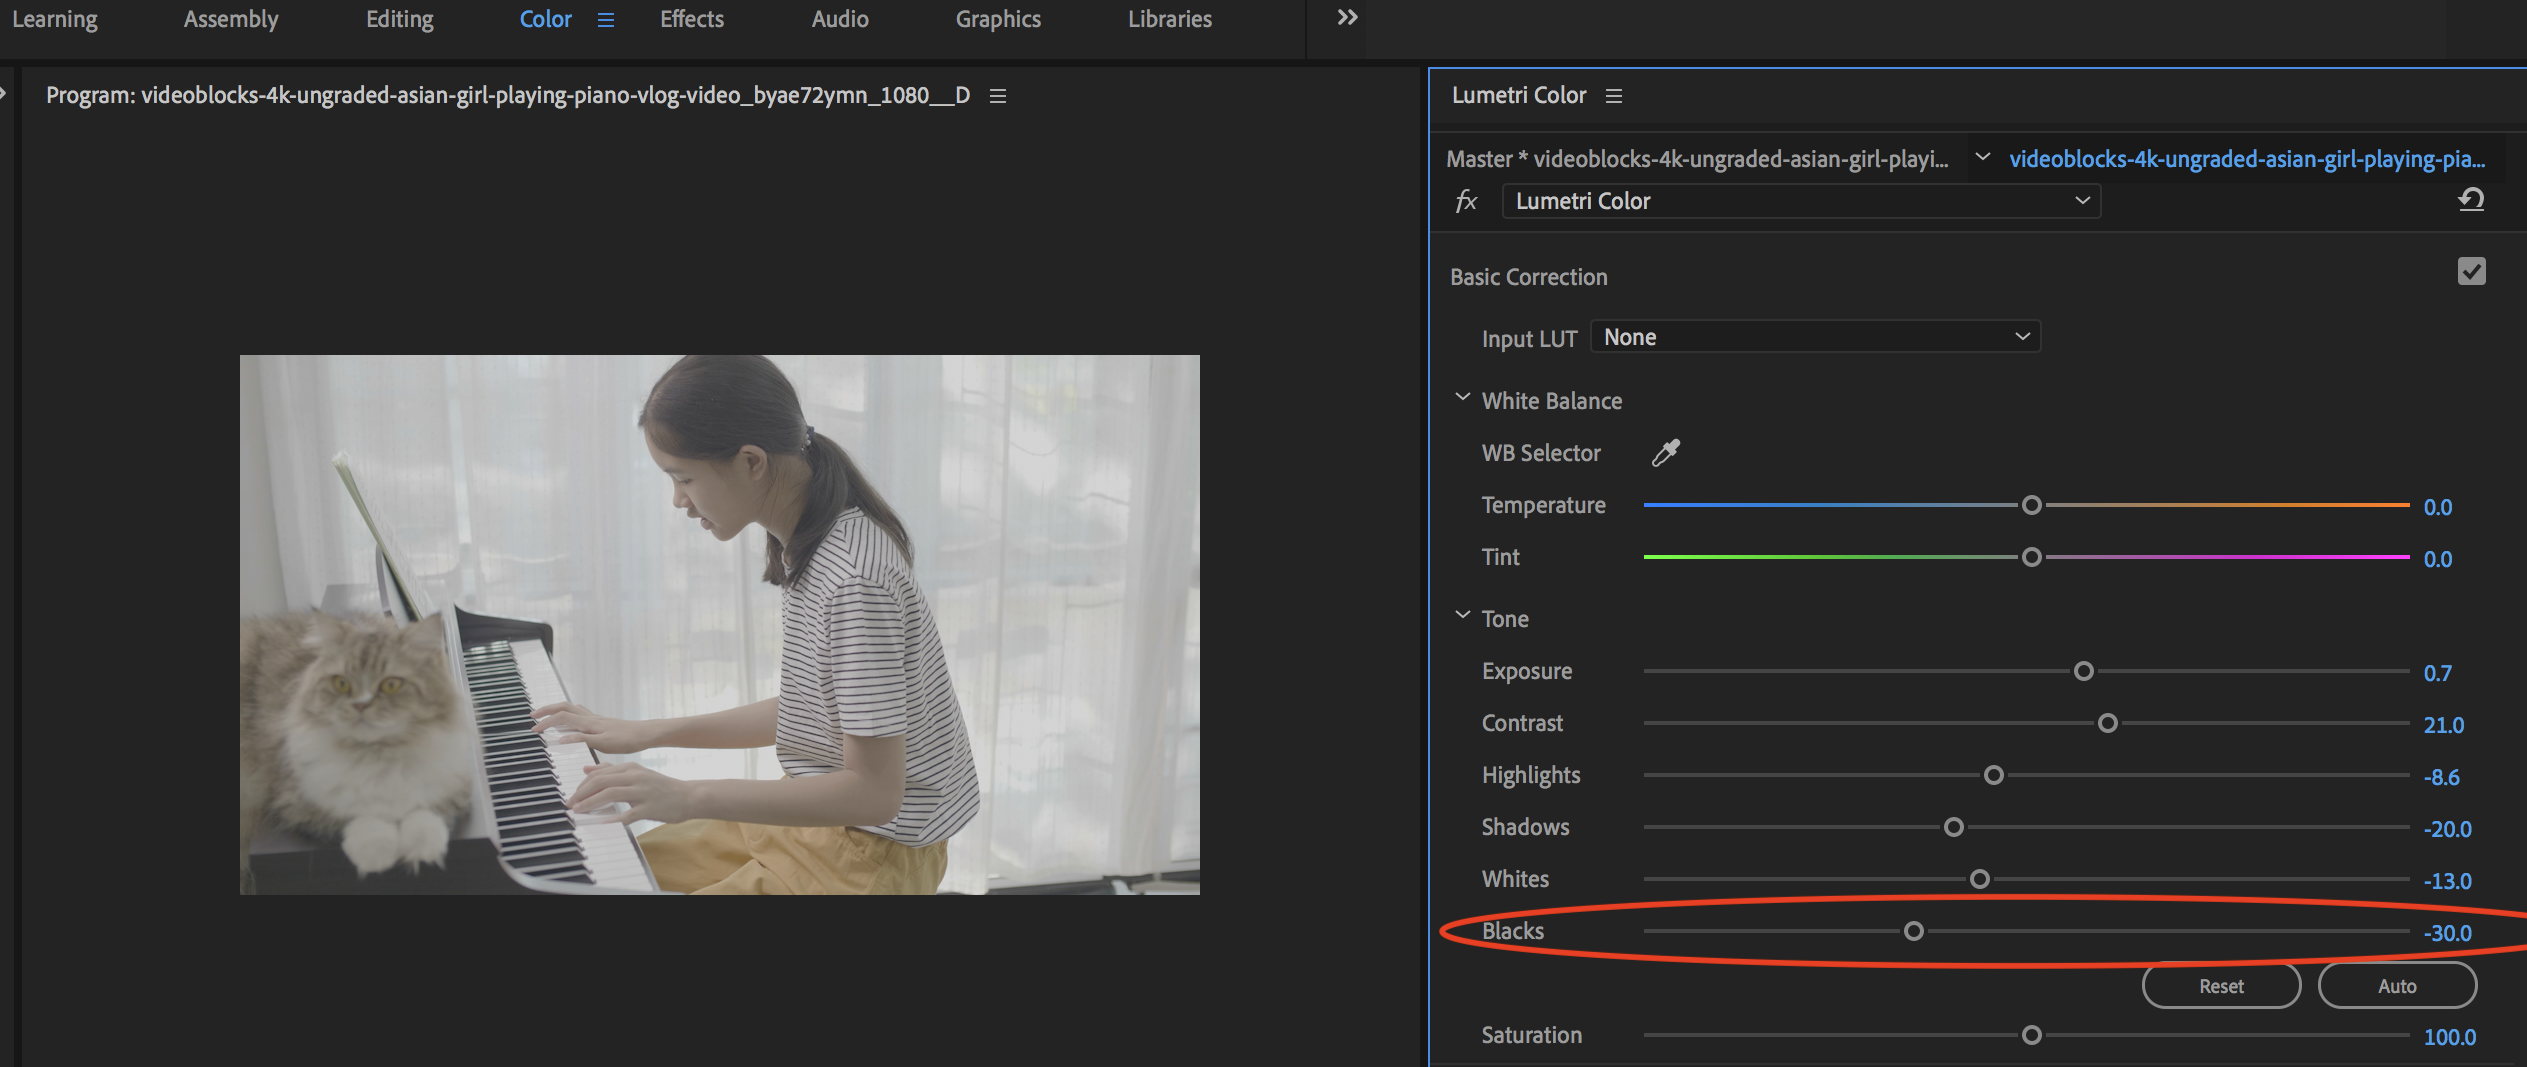
STEP 9: Next, with the Blacks slider, we'll reduce it to -30 so that the darkest parts have a rich black level.
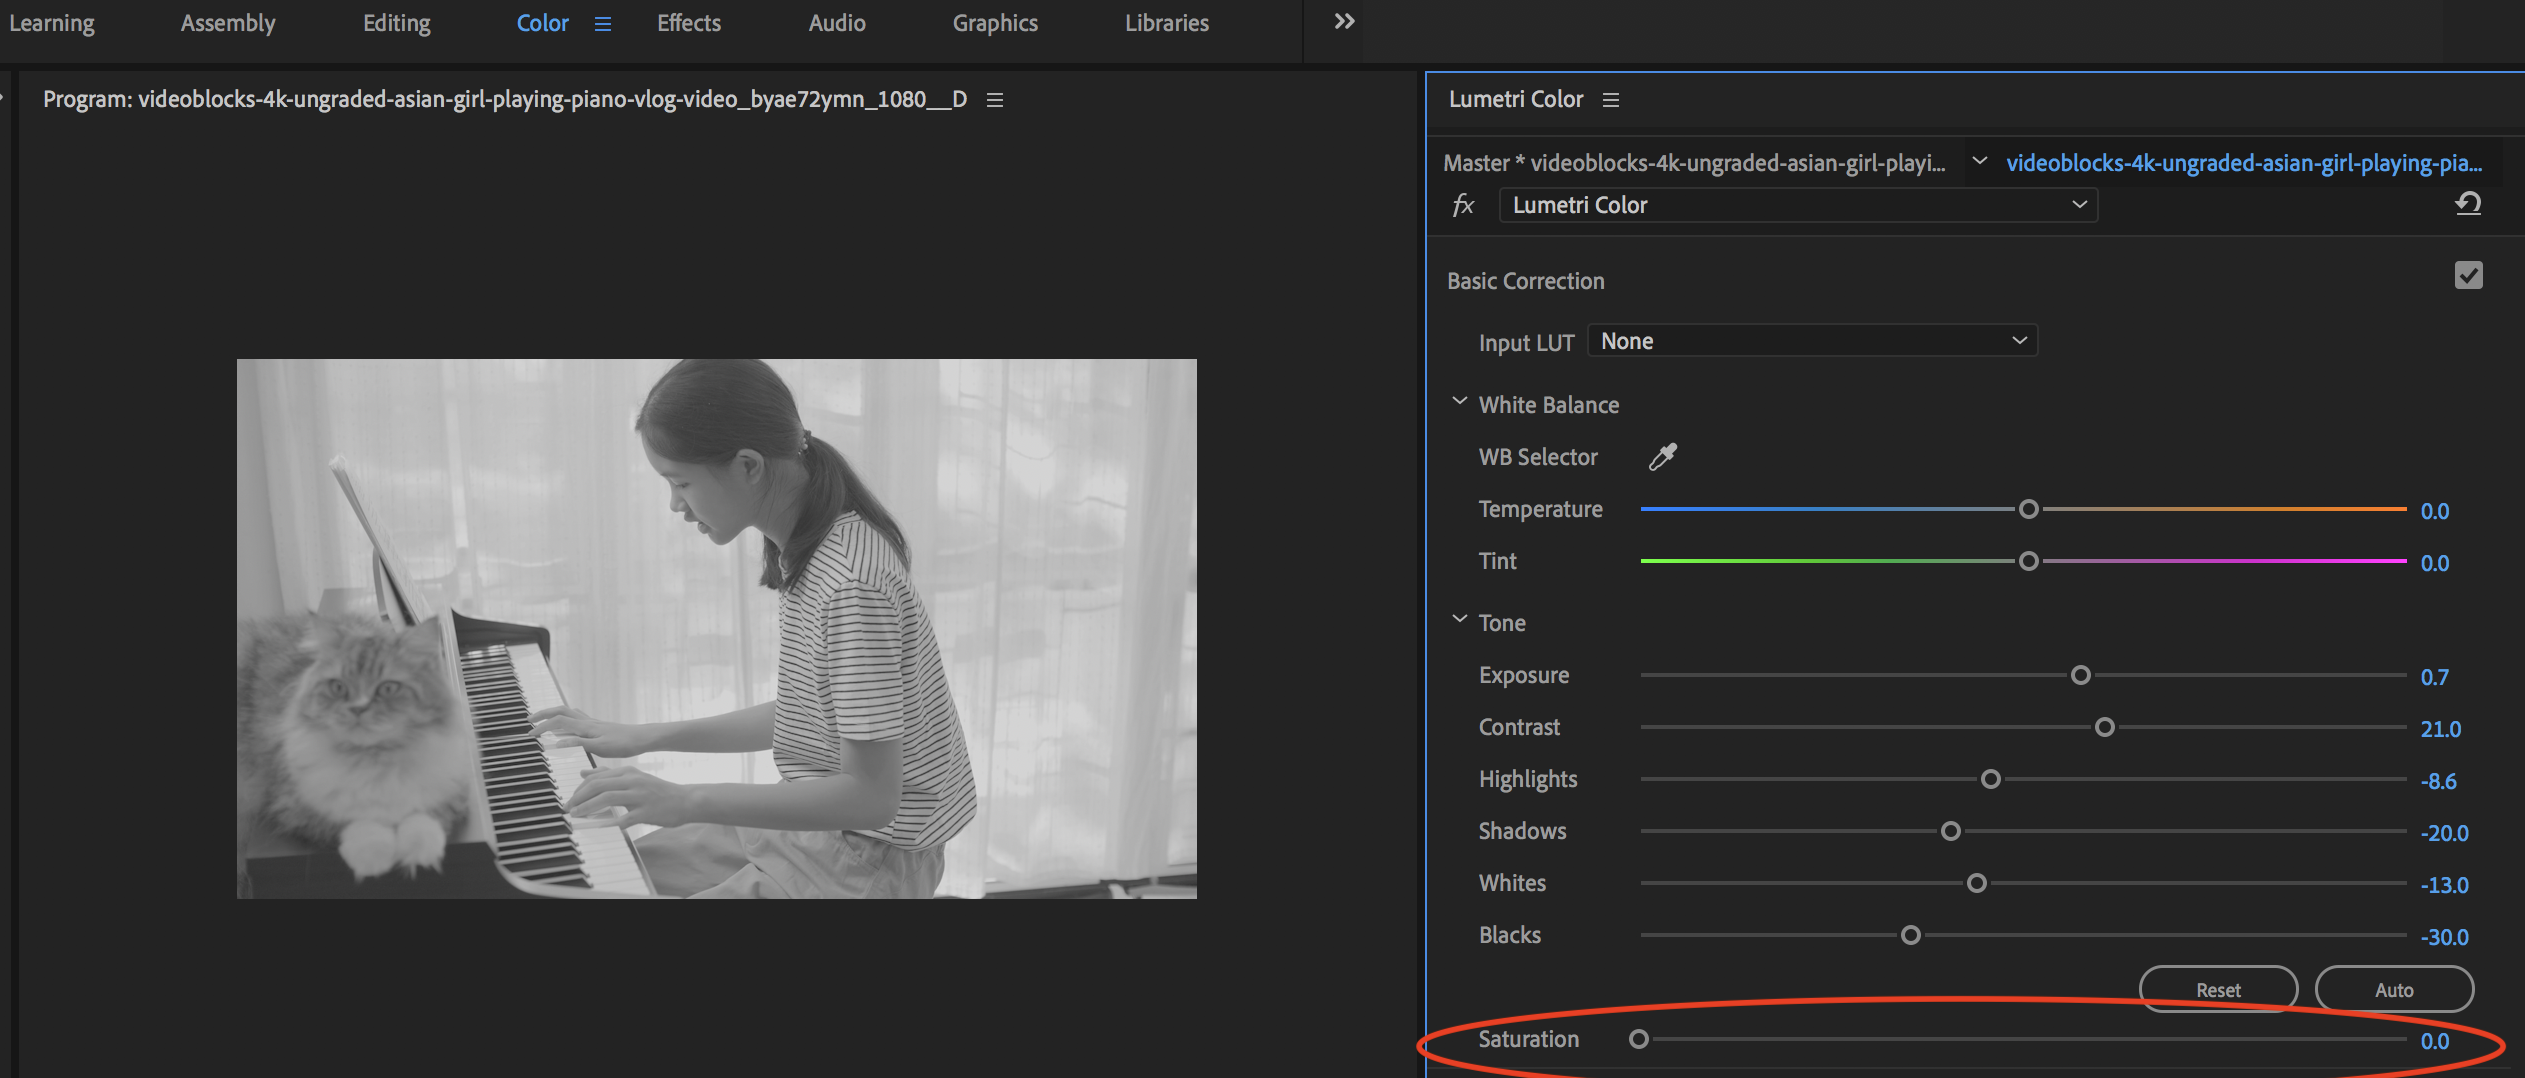
STEP 10: Lastly, we'll change the Saturation, which significantly alters the look of your footage. When the Saturation is set to 0, it will remove all of the footage's colors, giving you a black and white look.
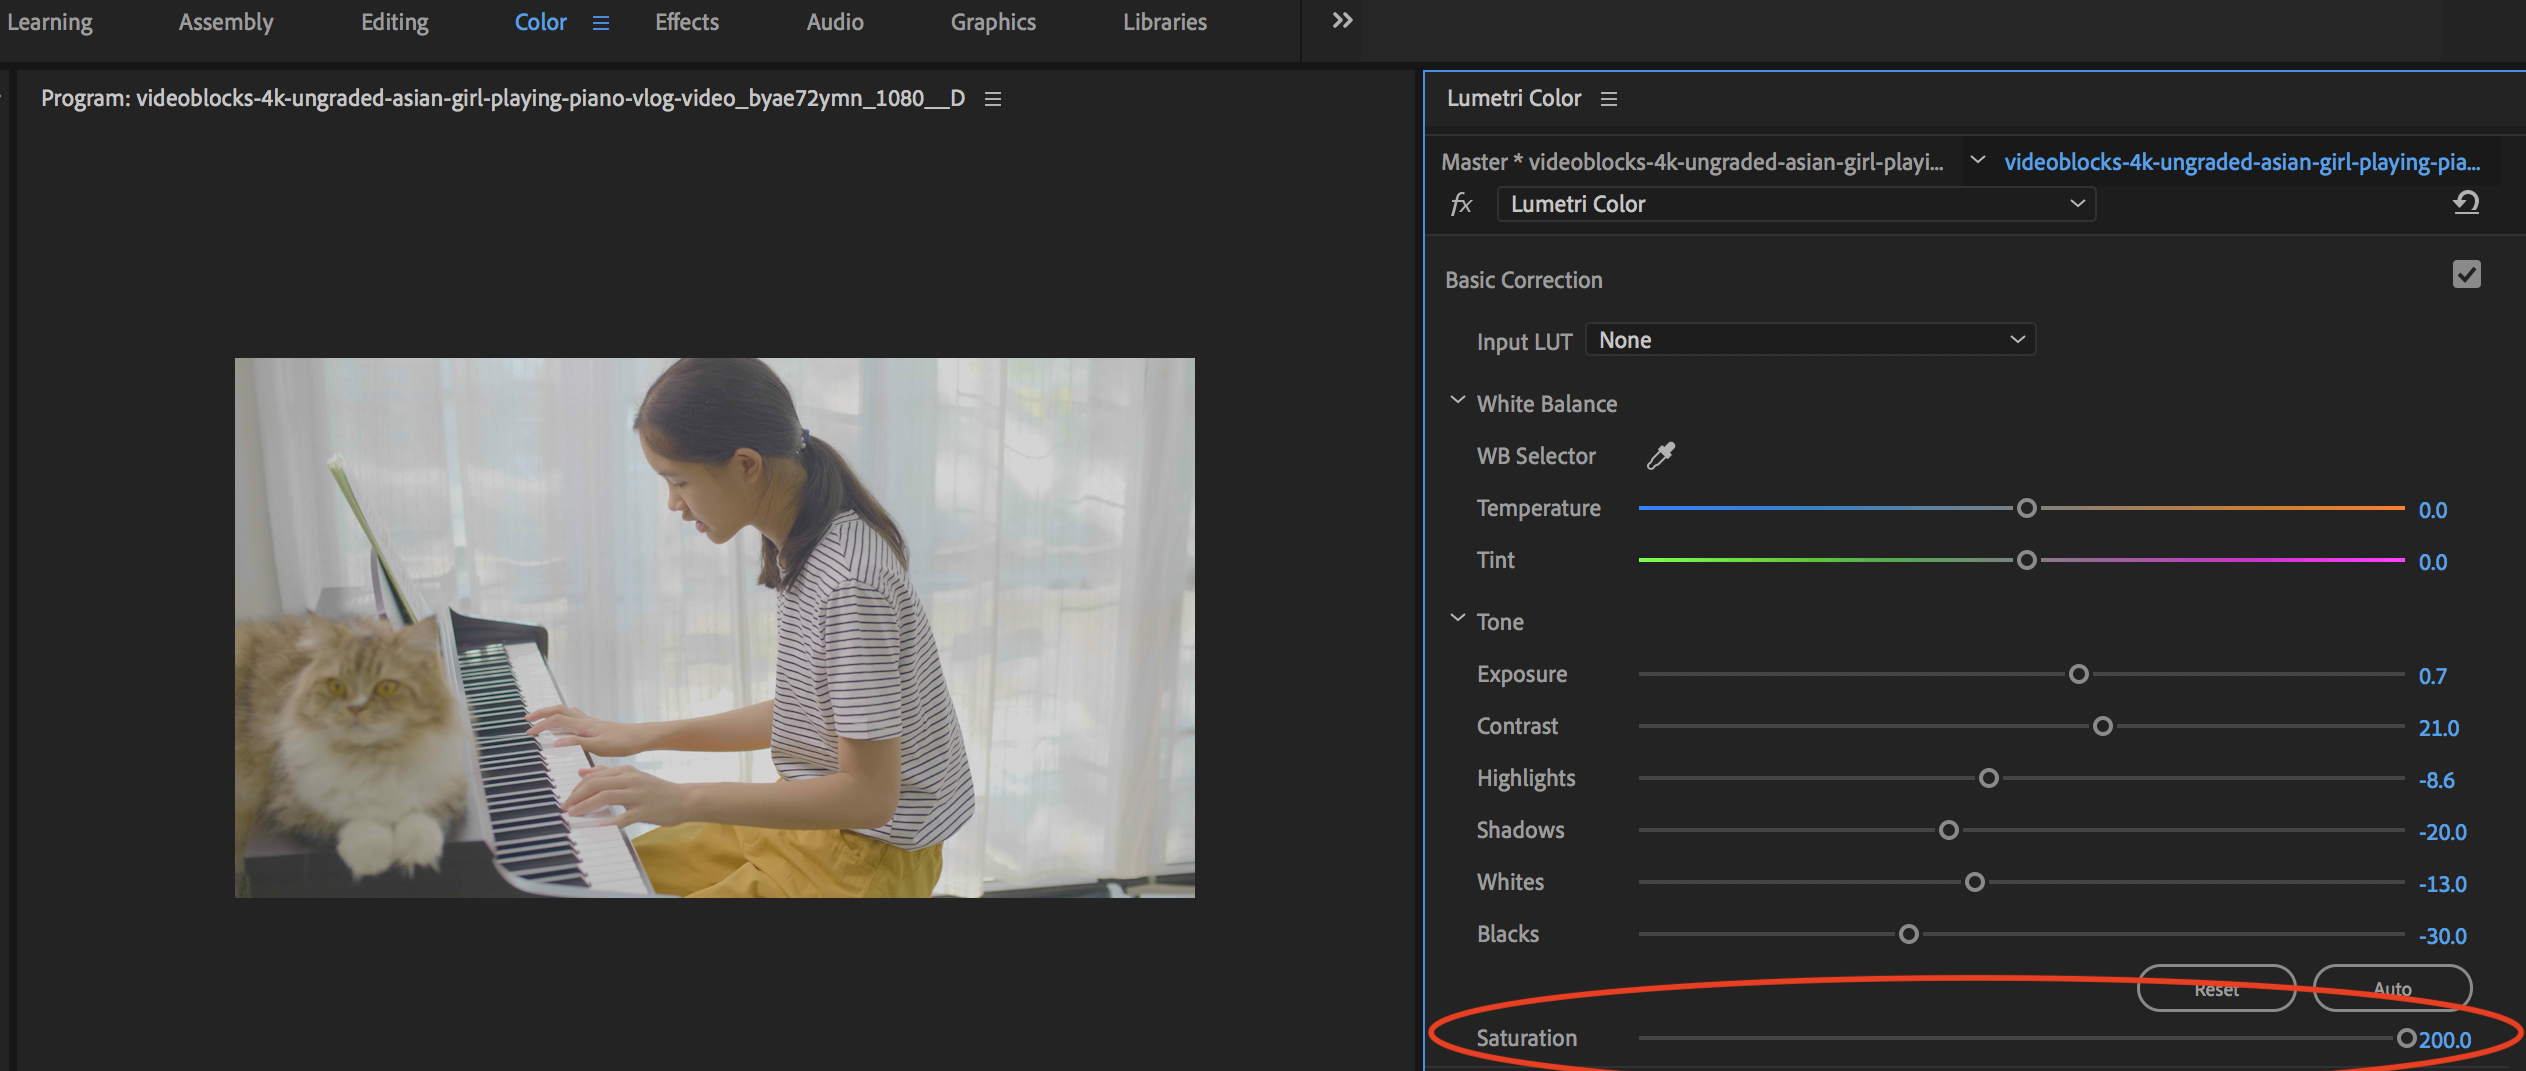
When the Saturation set high to 200, it will enrich all of the colors, making them vibrant. But be mindful that pushing the saturation higher also introduces noise to the video and can interrupt the previously established color correction. As you can see below, with a saturation of 200, the clip now has a green tint.
For this clip, set the Saturation to 137.
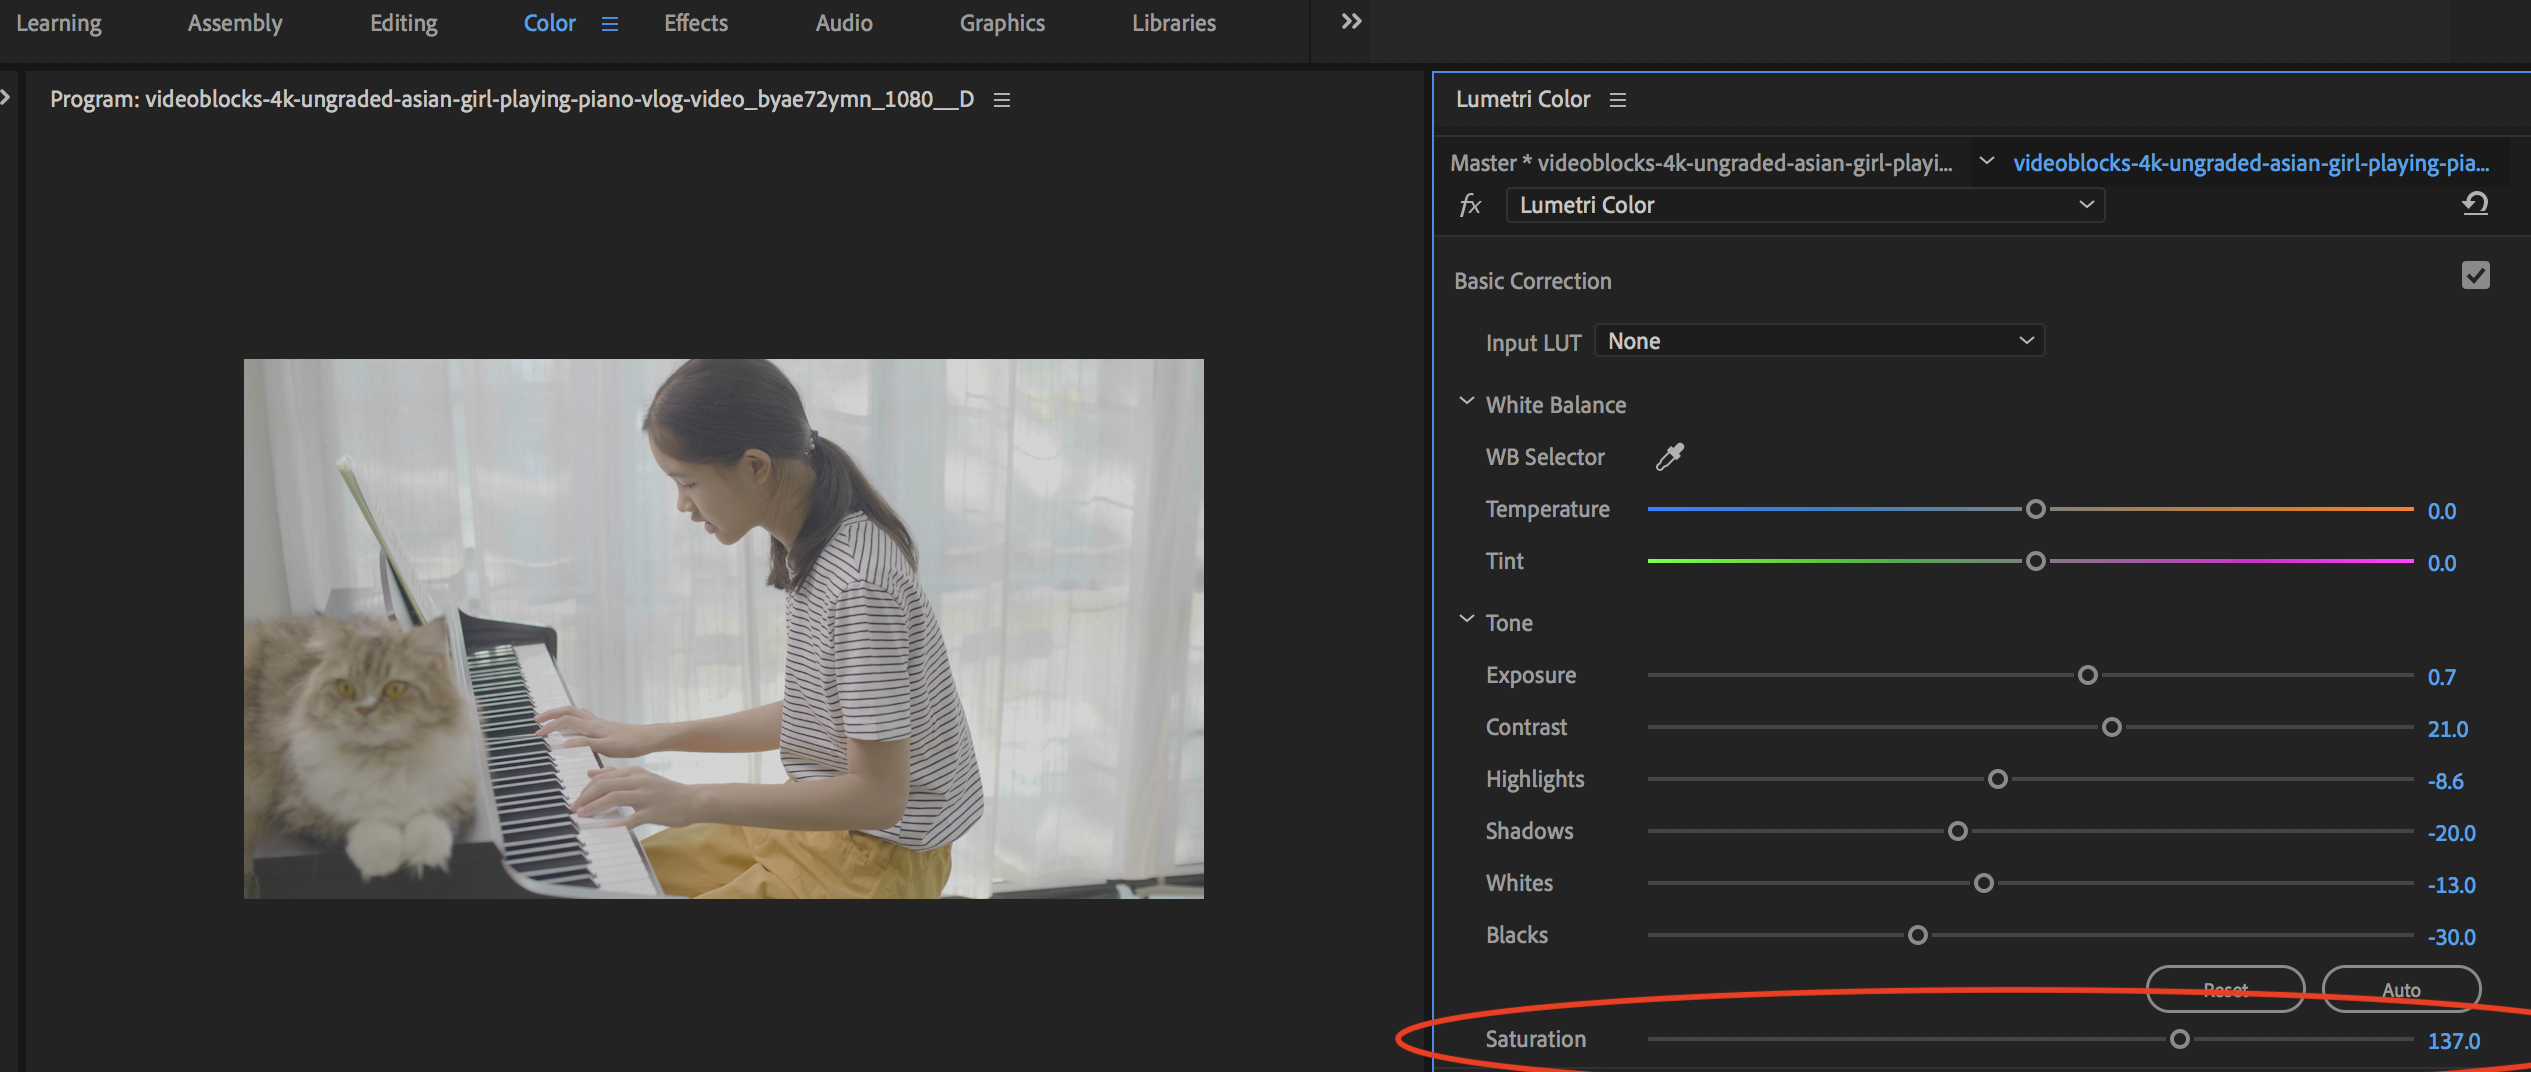
Now we've completed a basic color correction.